
hideToggle Update Log
timeline 2023,purple
更新提醒
endtimeline
endhideToggle
rss很方便,但有人不会用(?
为了提供更多元的订阅方式(?
提醒:Tinyletter会无理由封禁用户账户,我的账号已经被封了两次了,不建议使用。最近我会迁移邮件服务提供商并更新博客。在此之前,博客更新不会有邮件提醒(不过依然可以填写邮箱,我会迁移数据到新的服务商)
吐槽
我查了很多网上的教程,包括mailChimp,mailsender还有power automate等等,但都不行,有各种各样的原因。。。不过最后还是找到了
思路
- 在Zapier使用Rss作为触发器,给Tinyletter发送邮件。
- Tinyletter分发邮件给填写过表单的访客。
思路来自于 Newsletter for Hugo Blog 在此基础上增加了一些细节并翻译成中文。
link 获取网站的Favicon图标并显示在你的网页上,owen0o0,https://github.com/owen0o0/getFavicon
Tinyletter
-> Tinyletter官网
注册过程不再赘述。
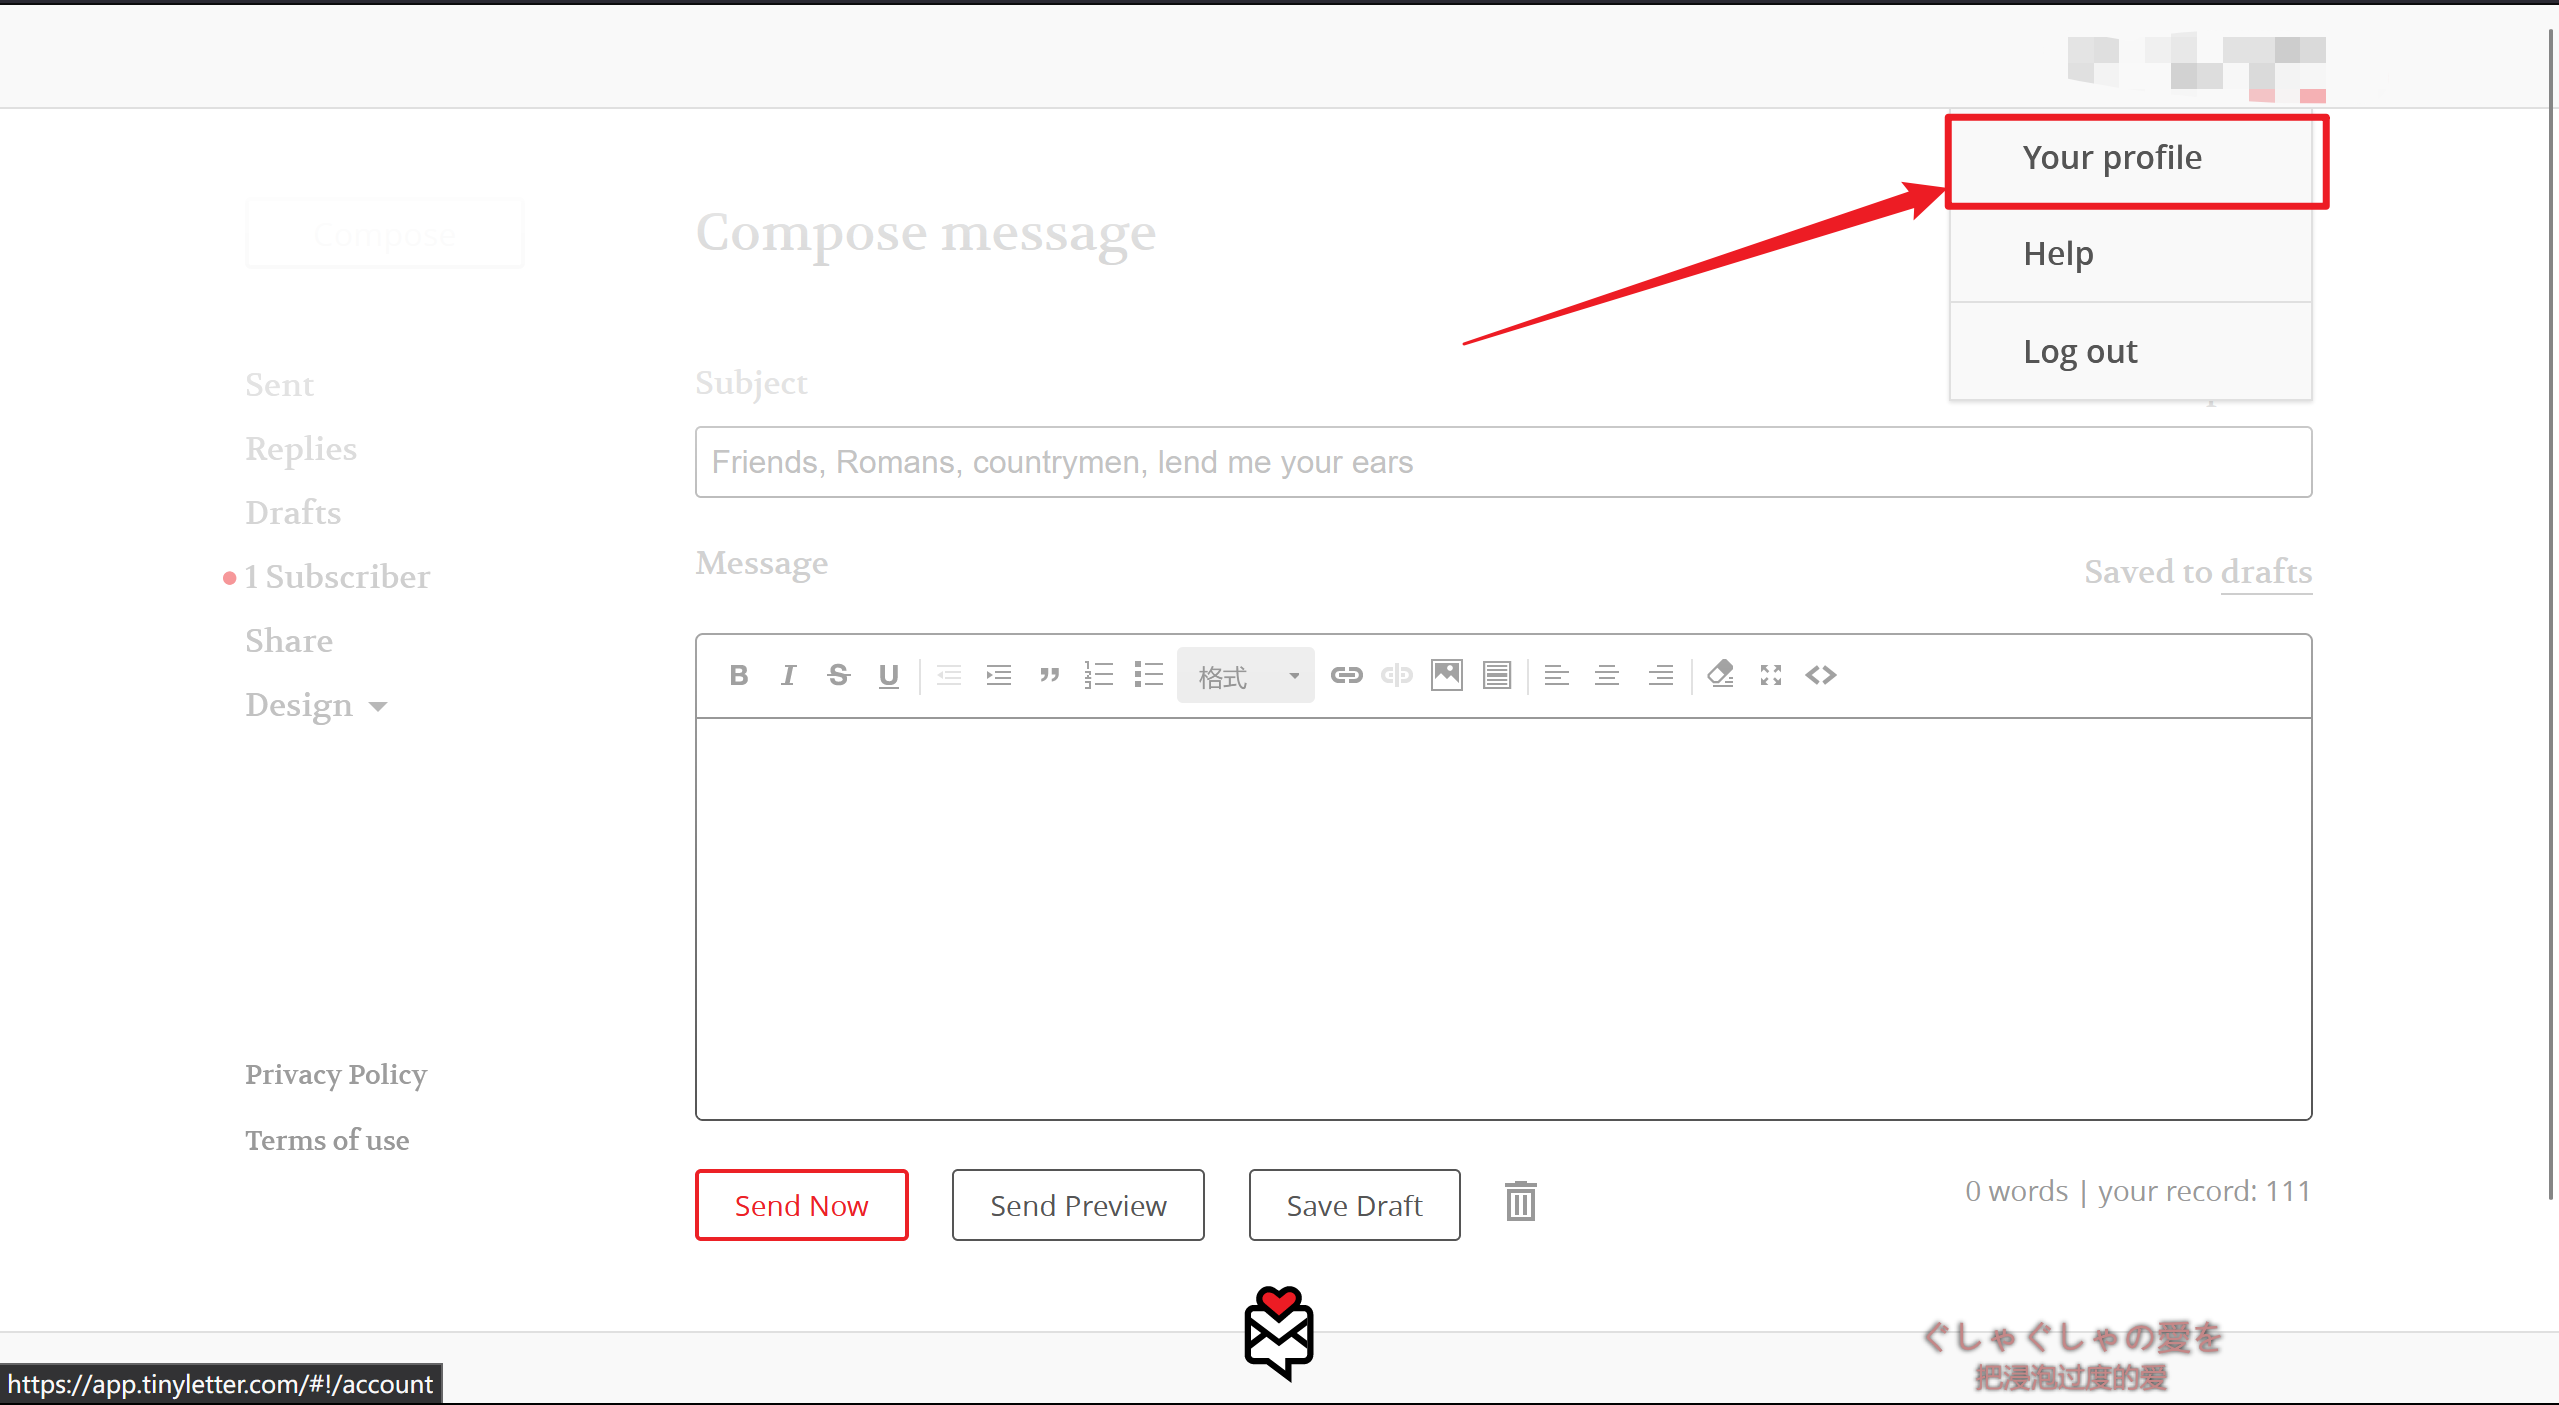
- 进入个人档案
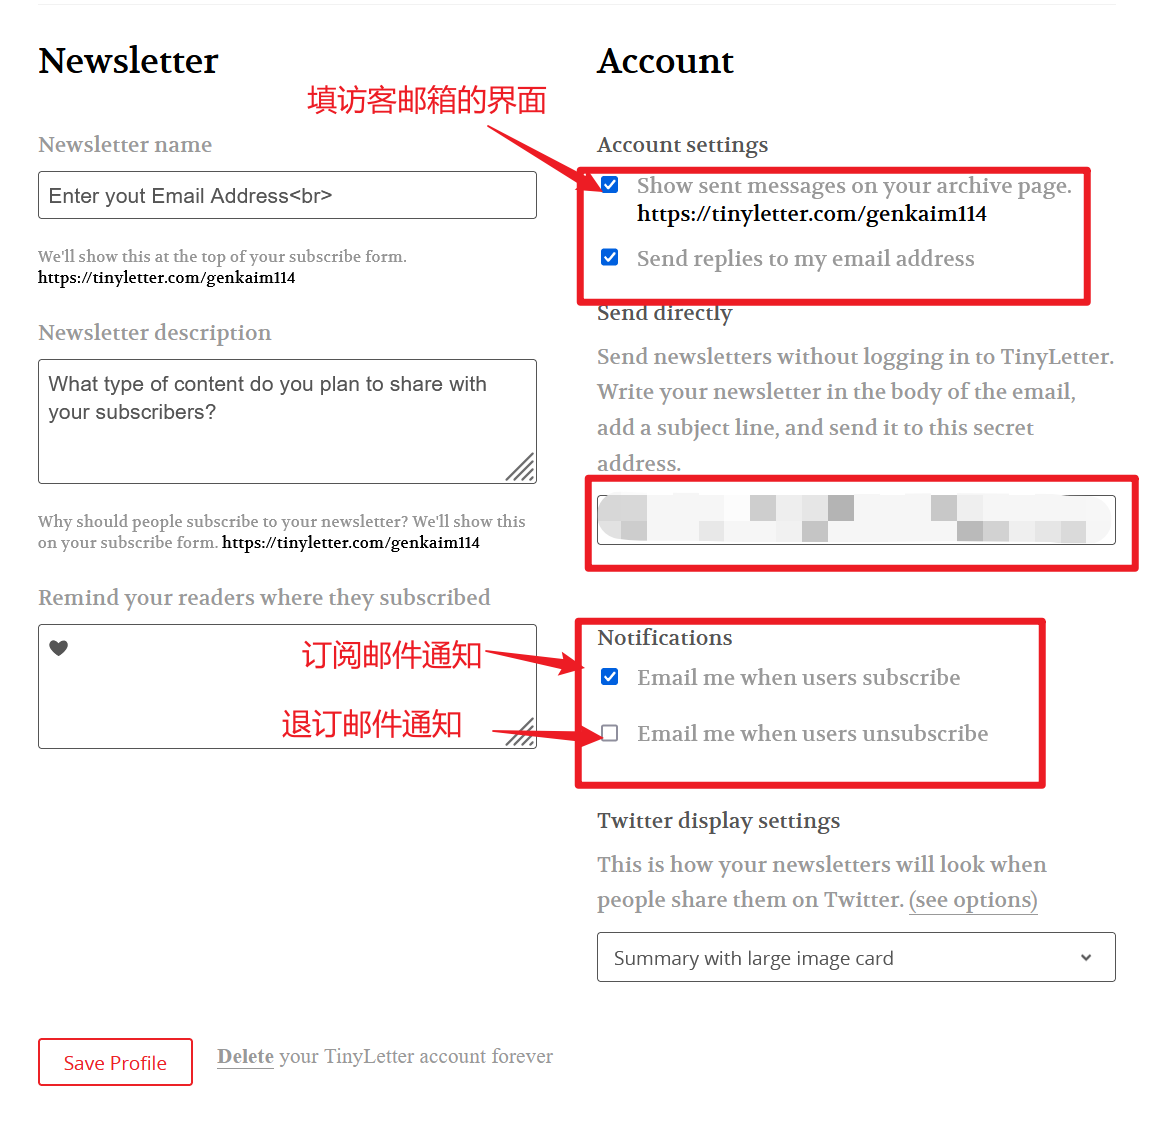
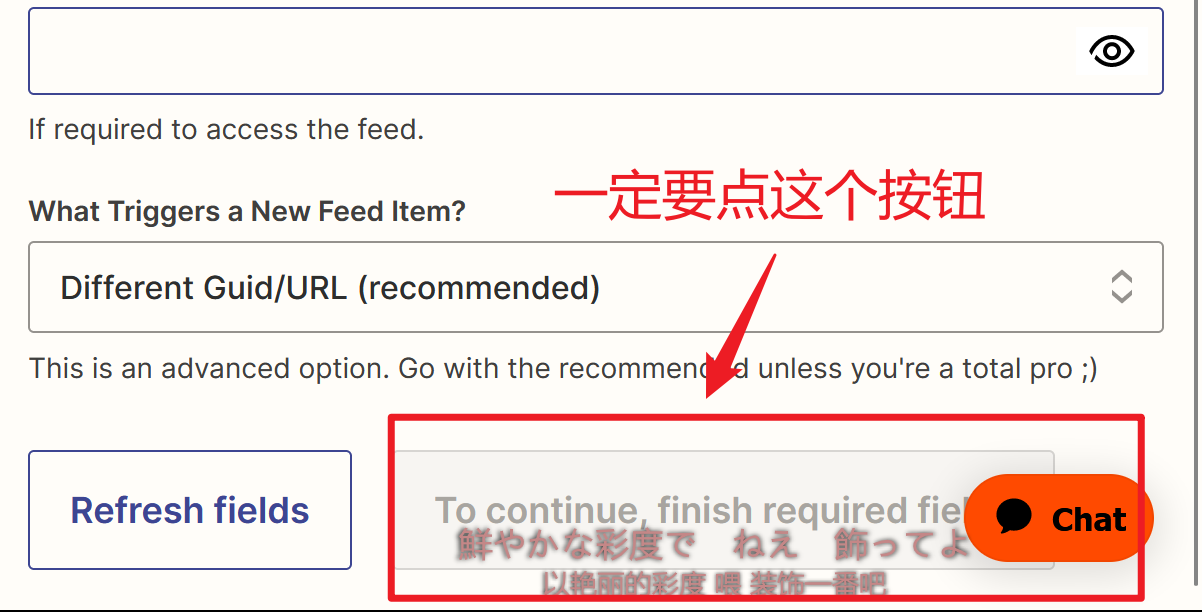
- 填写表单,Newsletter暂时不用管,随便填一些,填完记得保存。 如果出现跳转,那是有必填项目没填 (它这提示我当时不知道为什么就是没看到,卡了好久。。。
把这里打马赛克的地方复制下来,下一阶段要用
红色框出的网址是访客填邮箱用的,记得添加到博客,下一步会对其美化
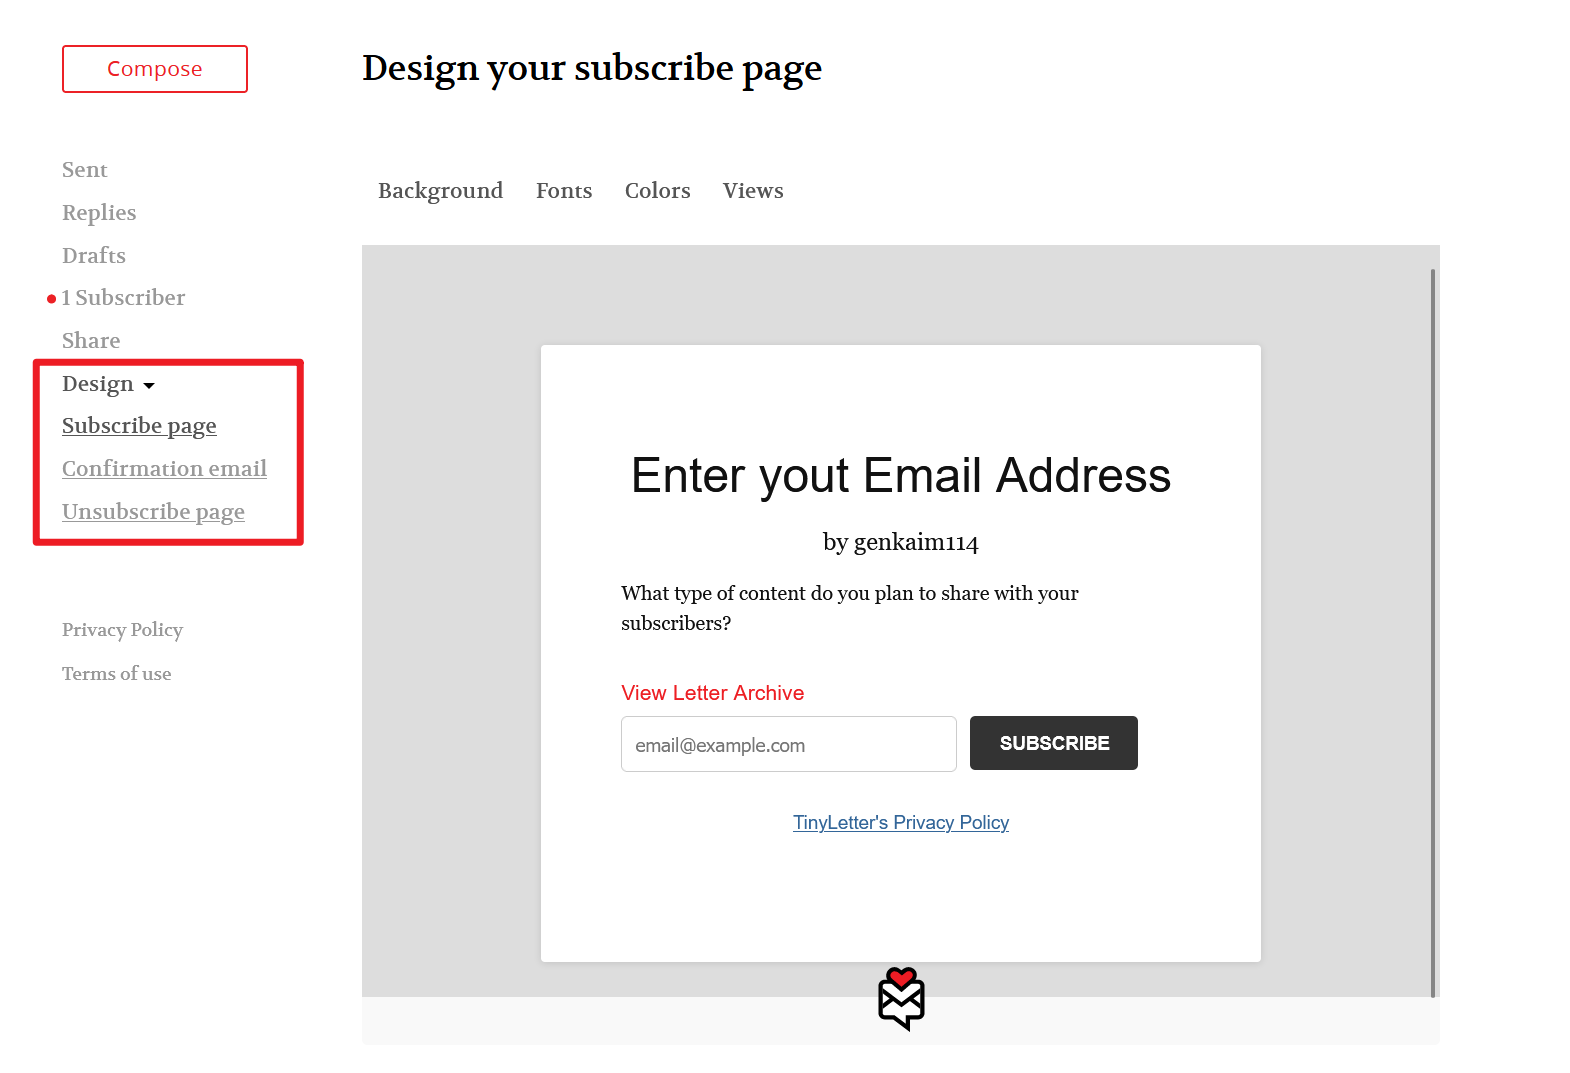
- 个性化表单界面(views指不同情况下,报错、邮件格式错误…的界面)
Tinyletter部分完成了。
注意,每次博客文章更新,你会在Draft一栏看到Zapier发送的邮件,你需要手动发送给订阅者(不过是一键的)
Zapier
-> zapier官网
注册过程不再赘述。
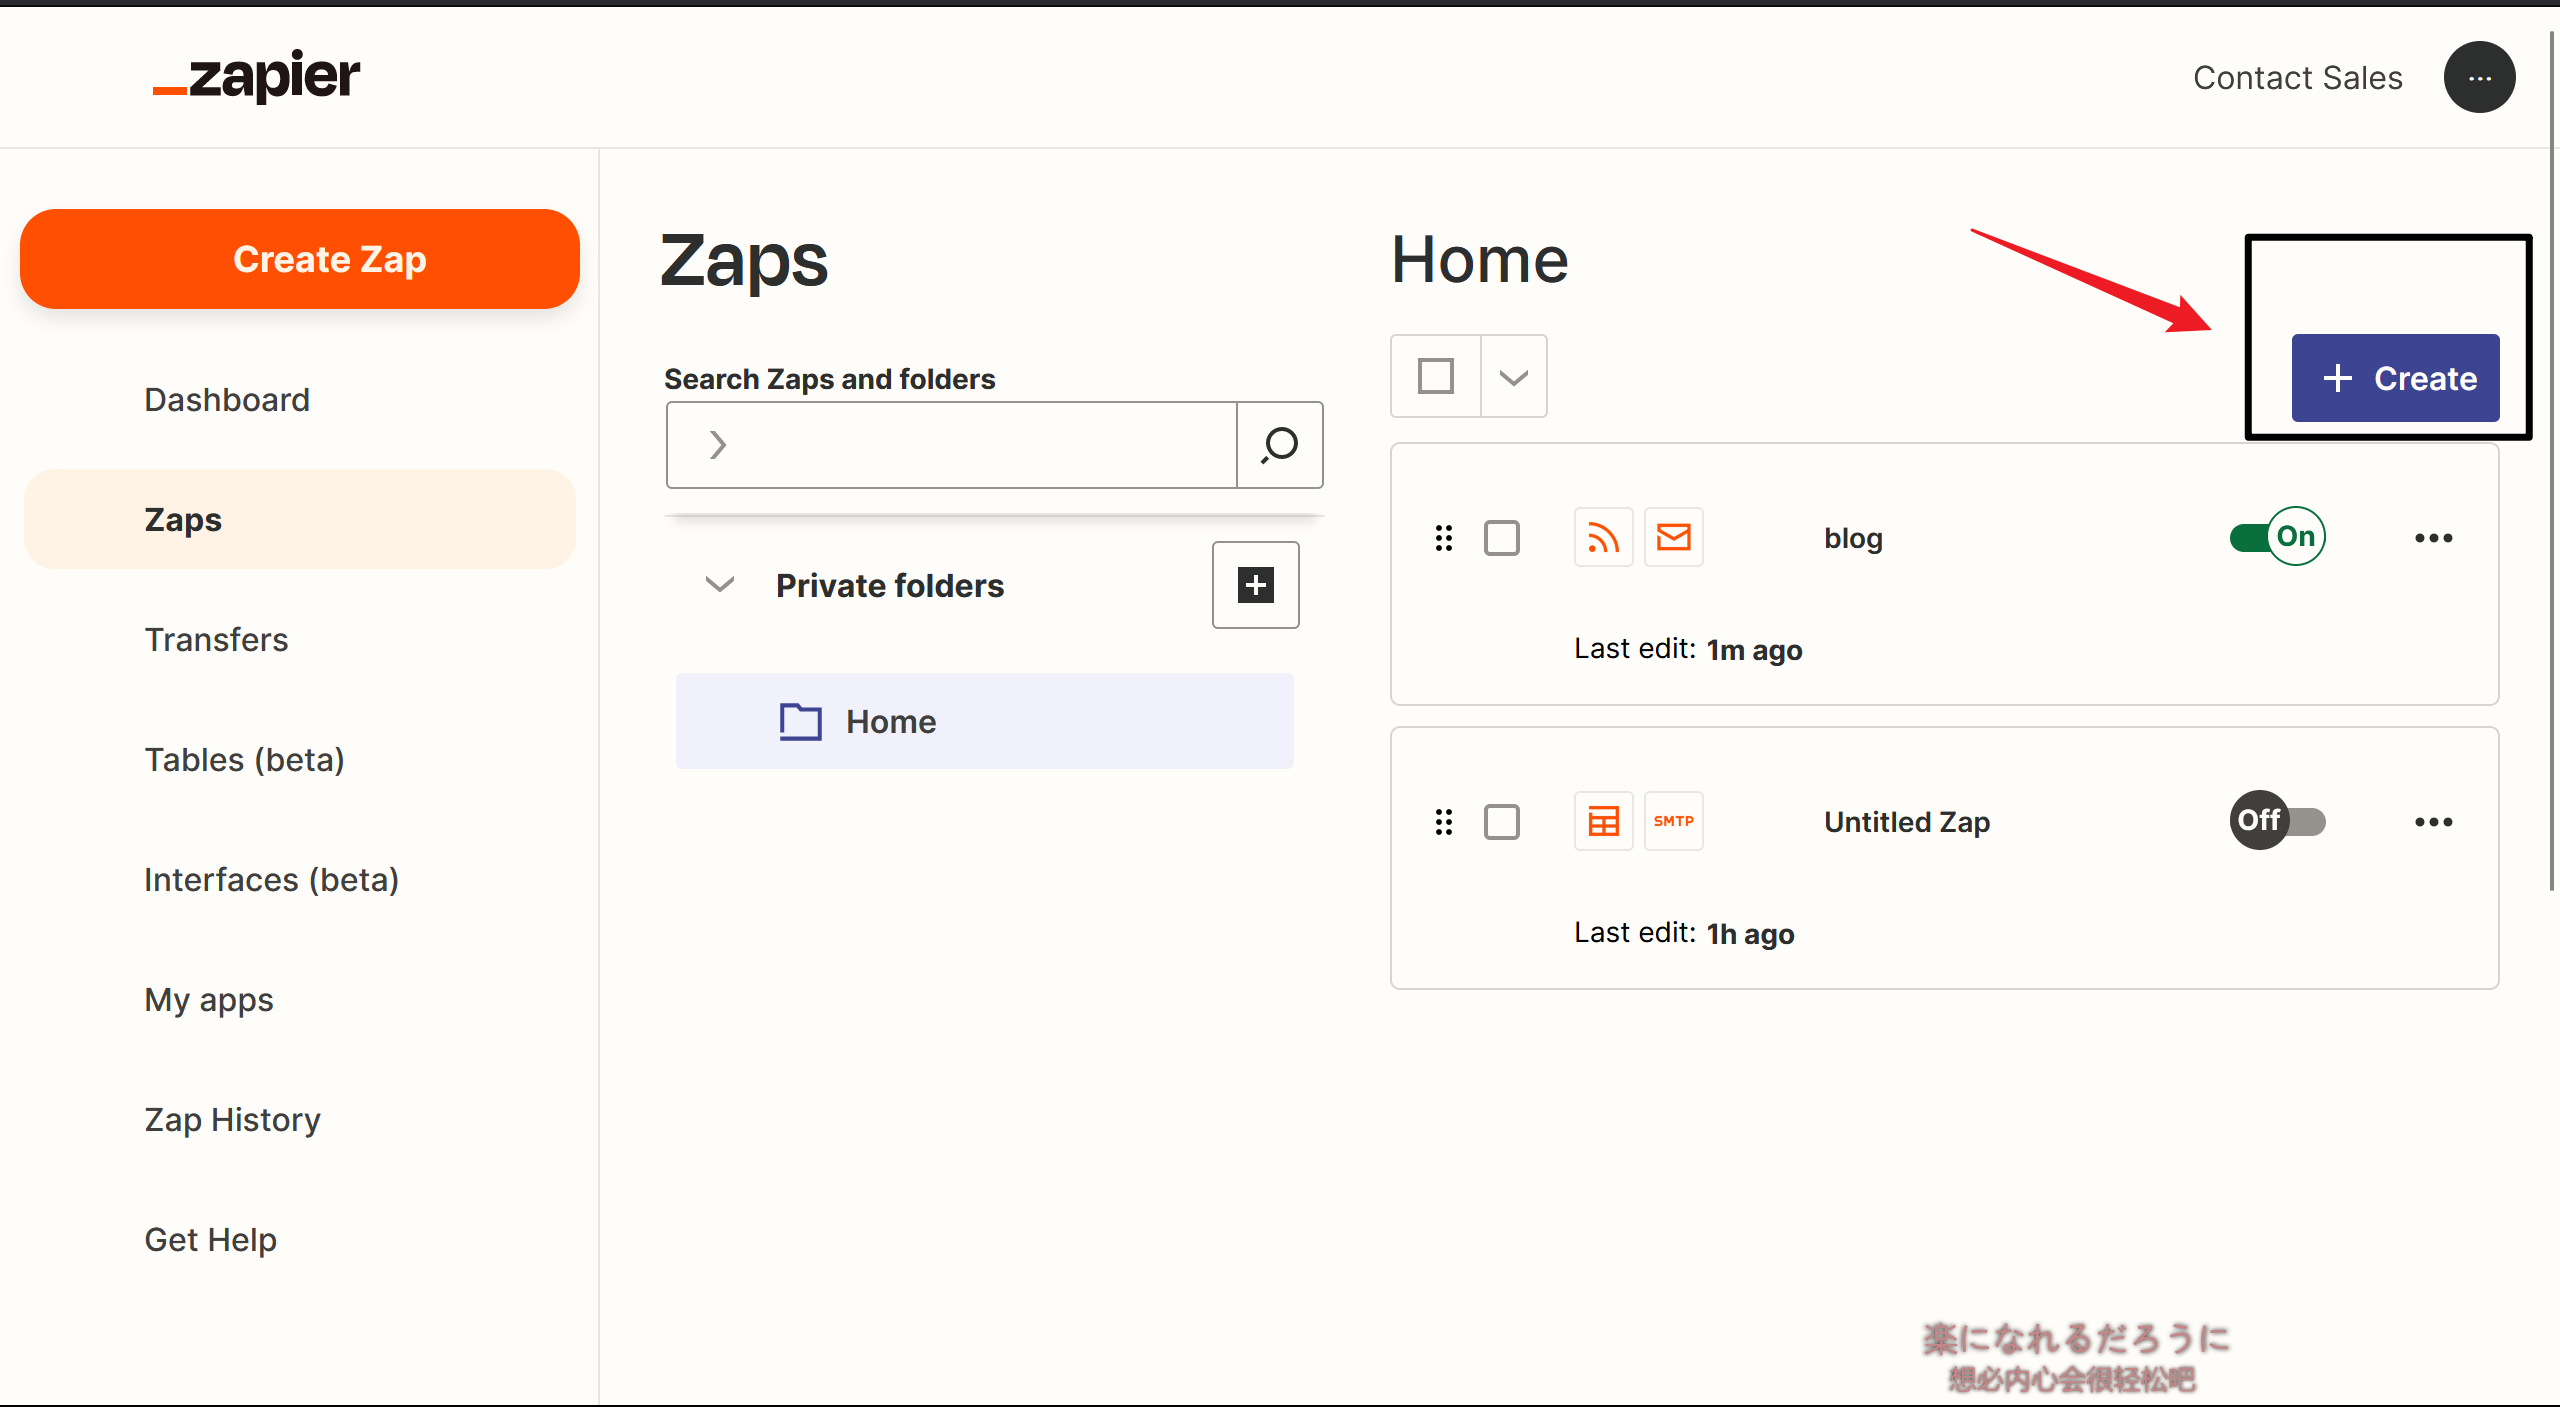
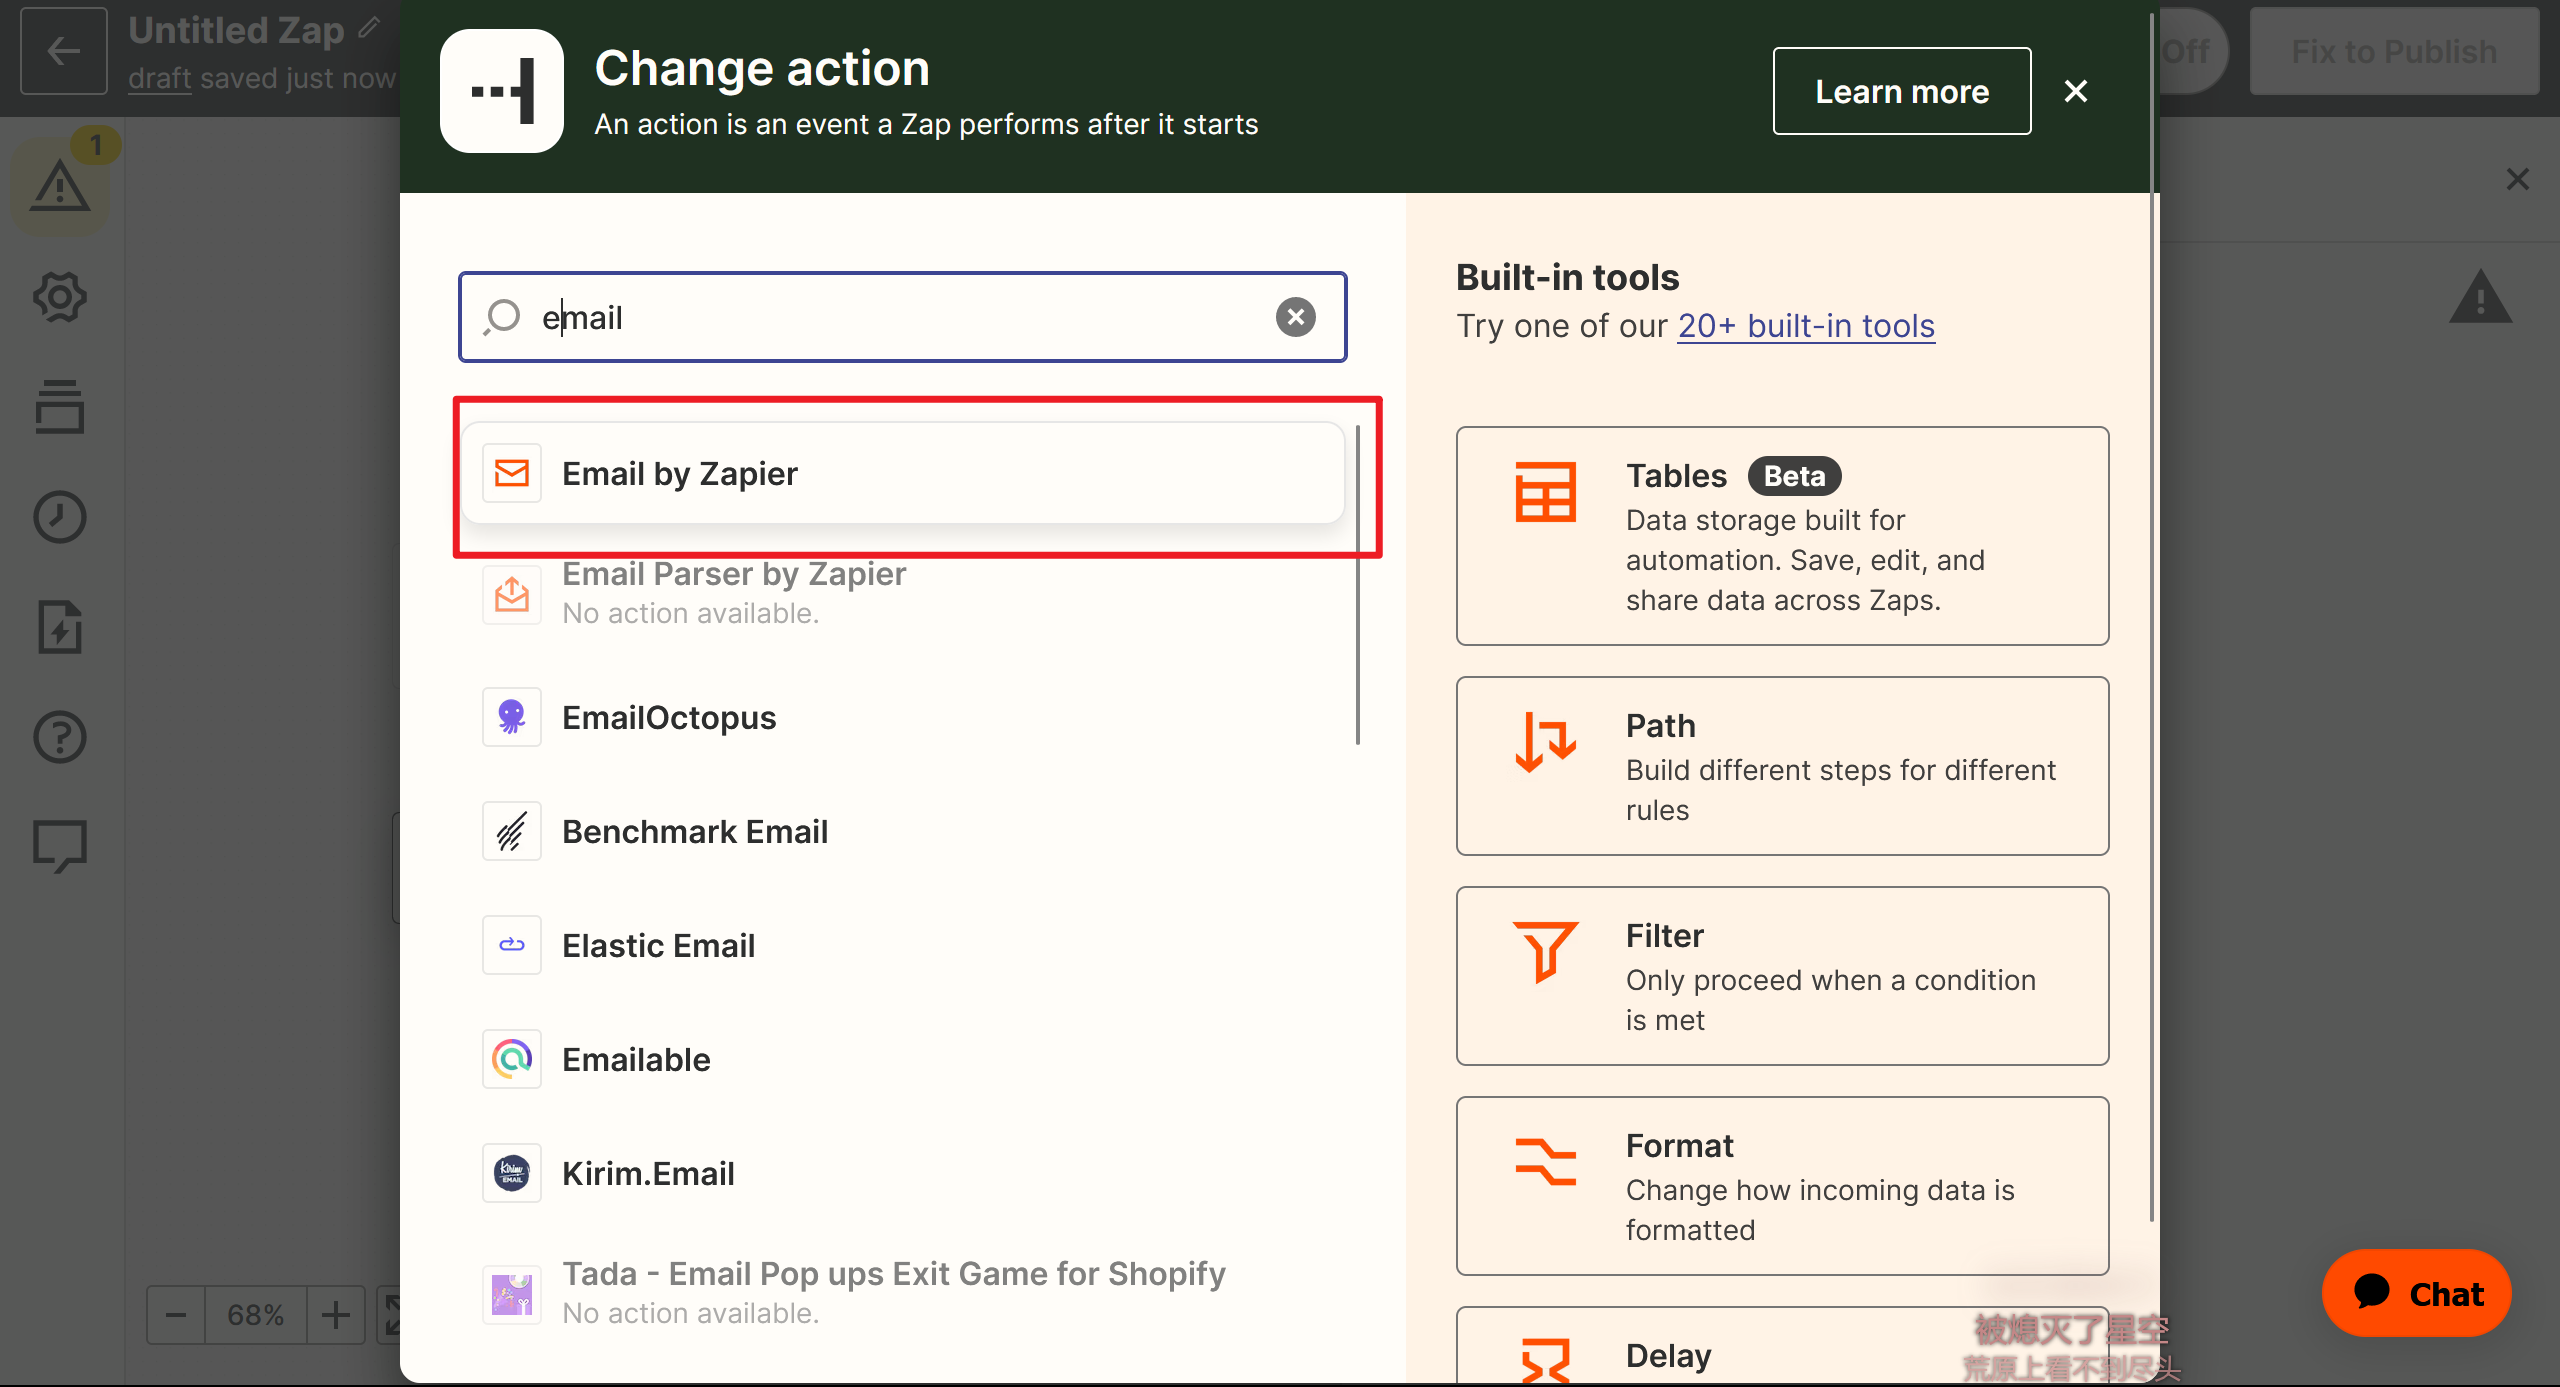
- 进入仪表盘,新建zap
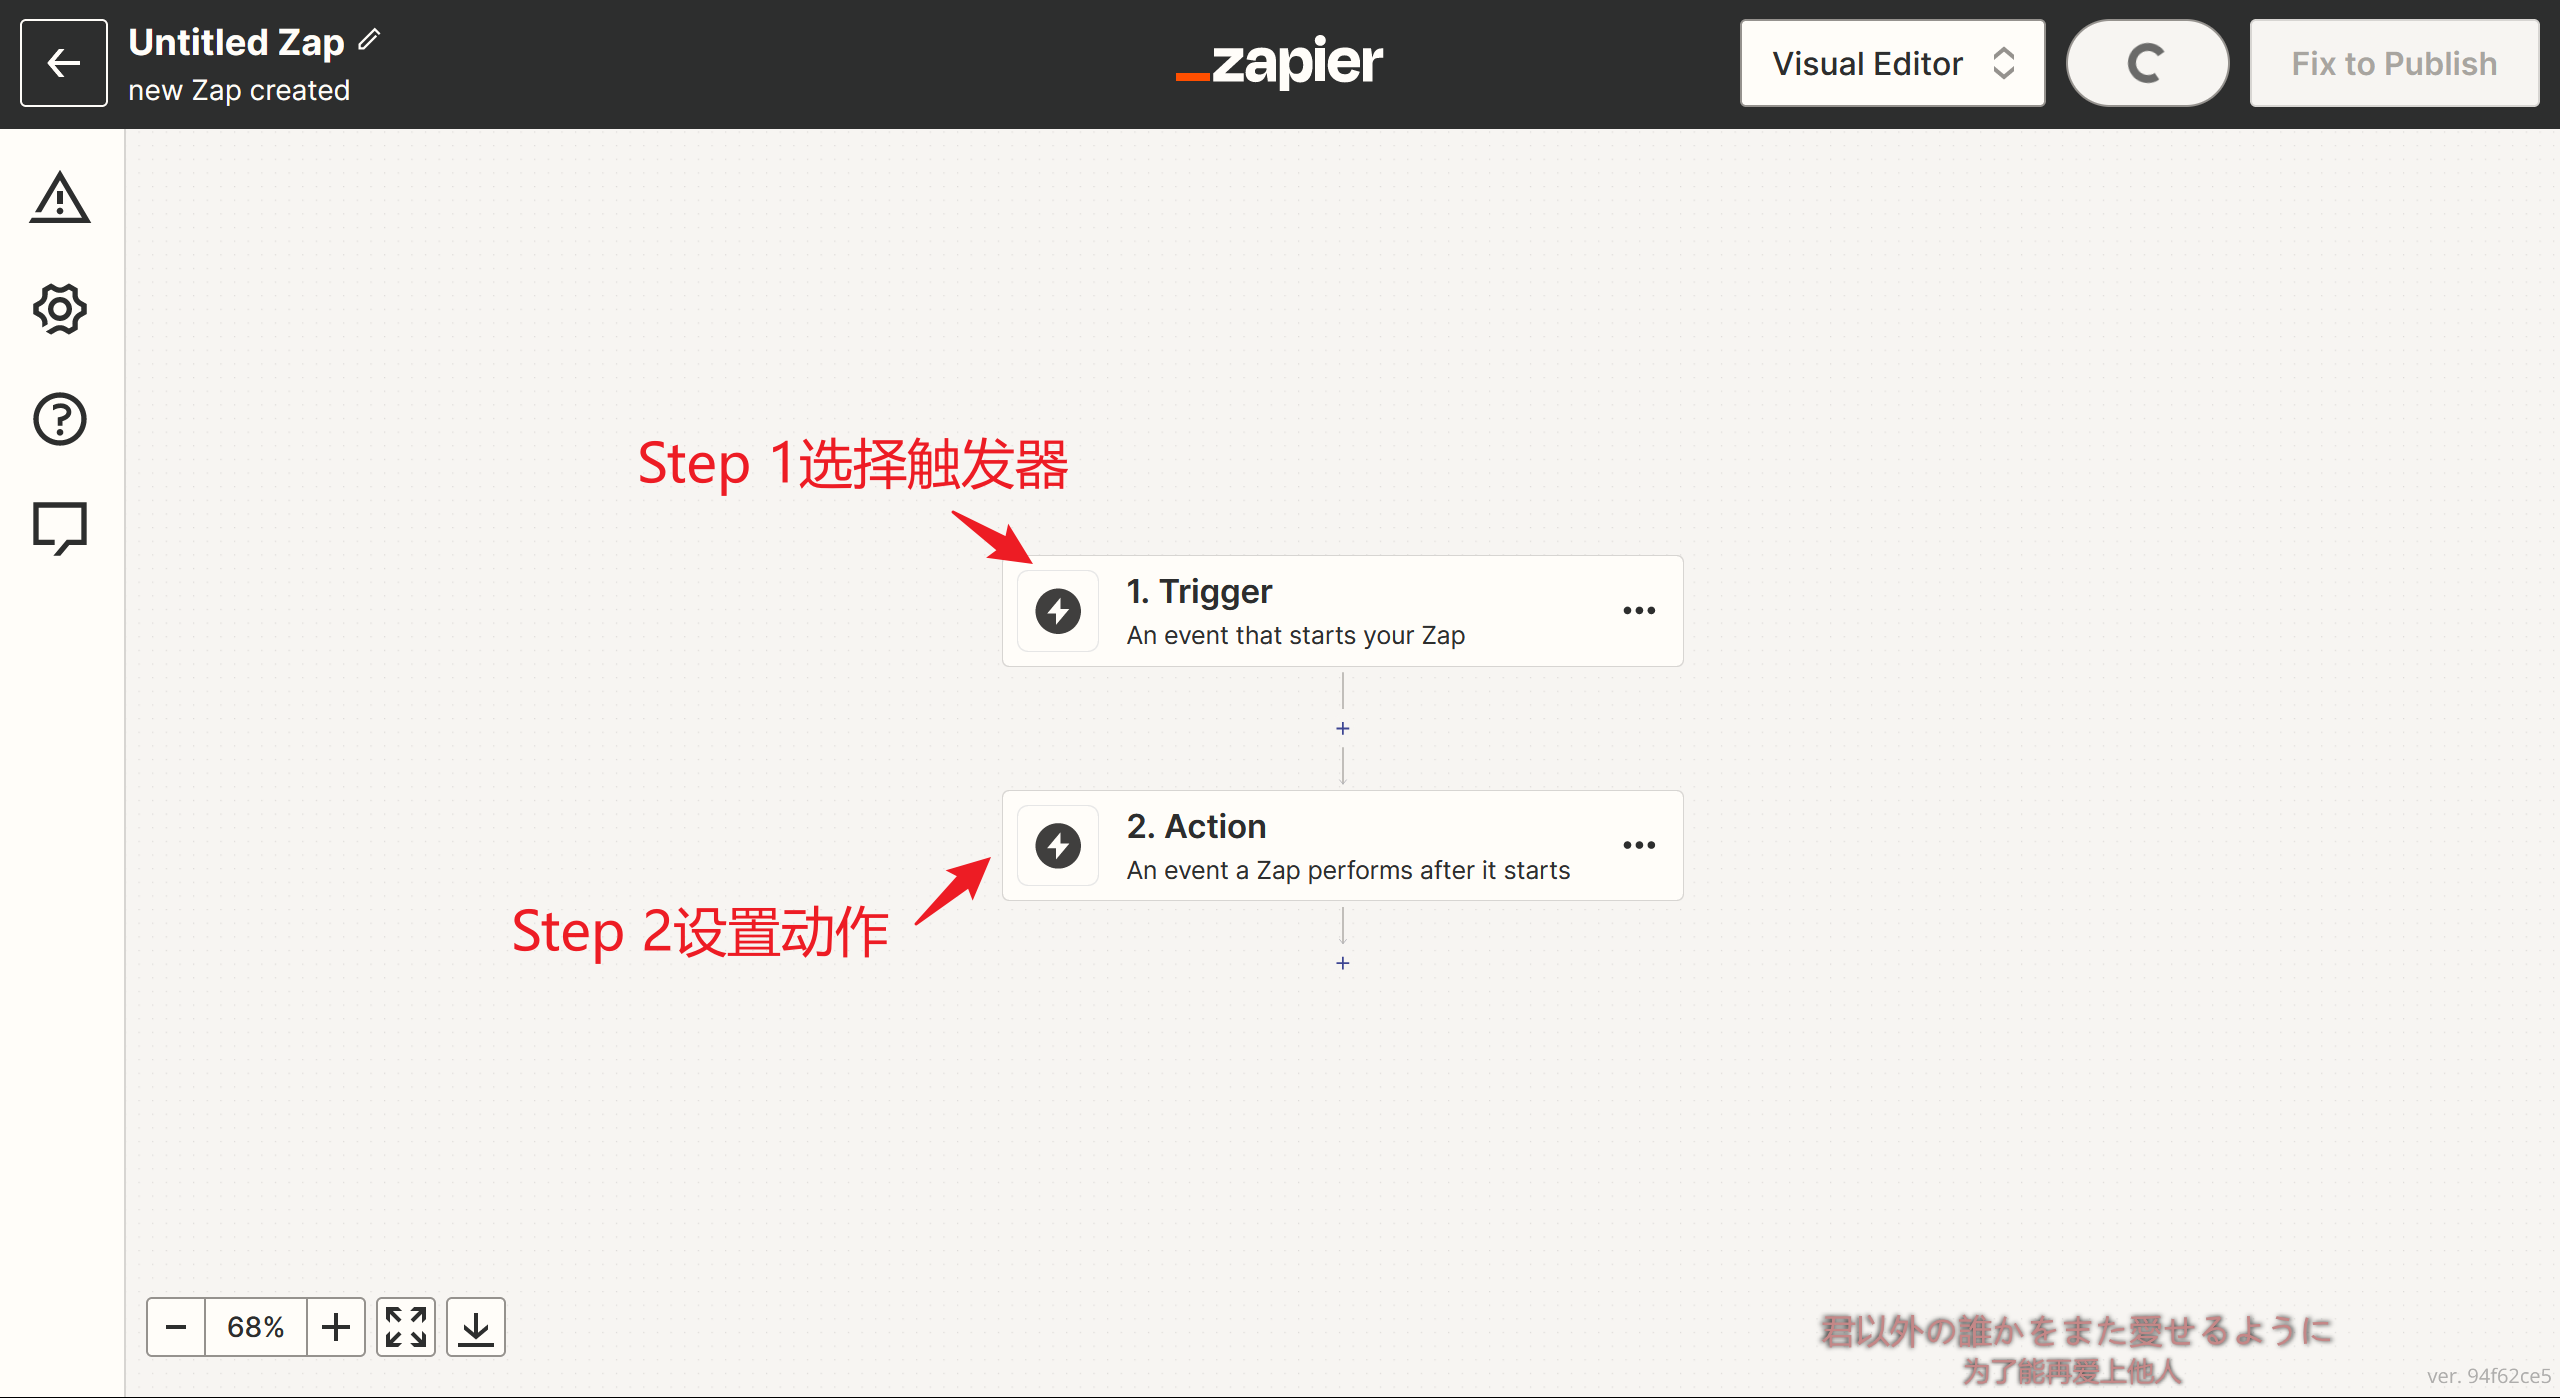
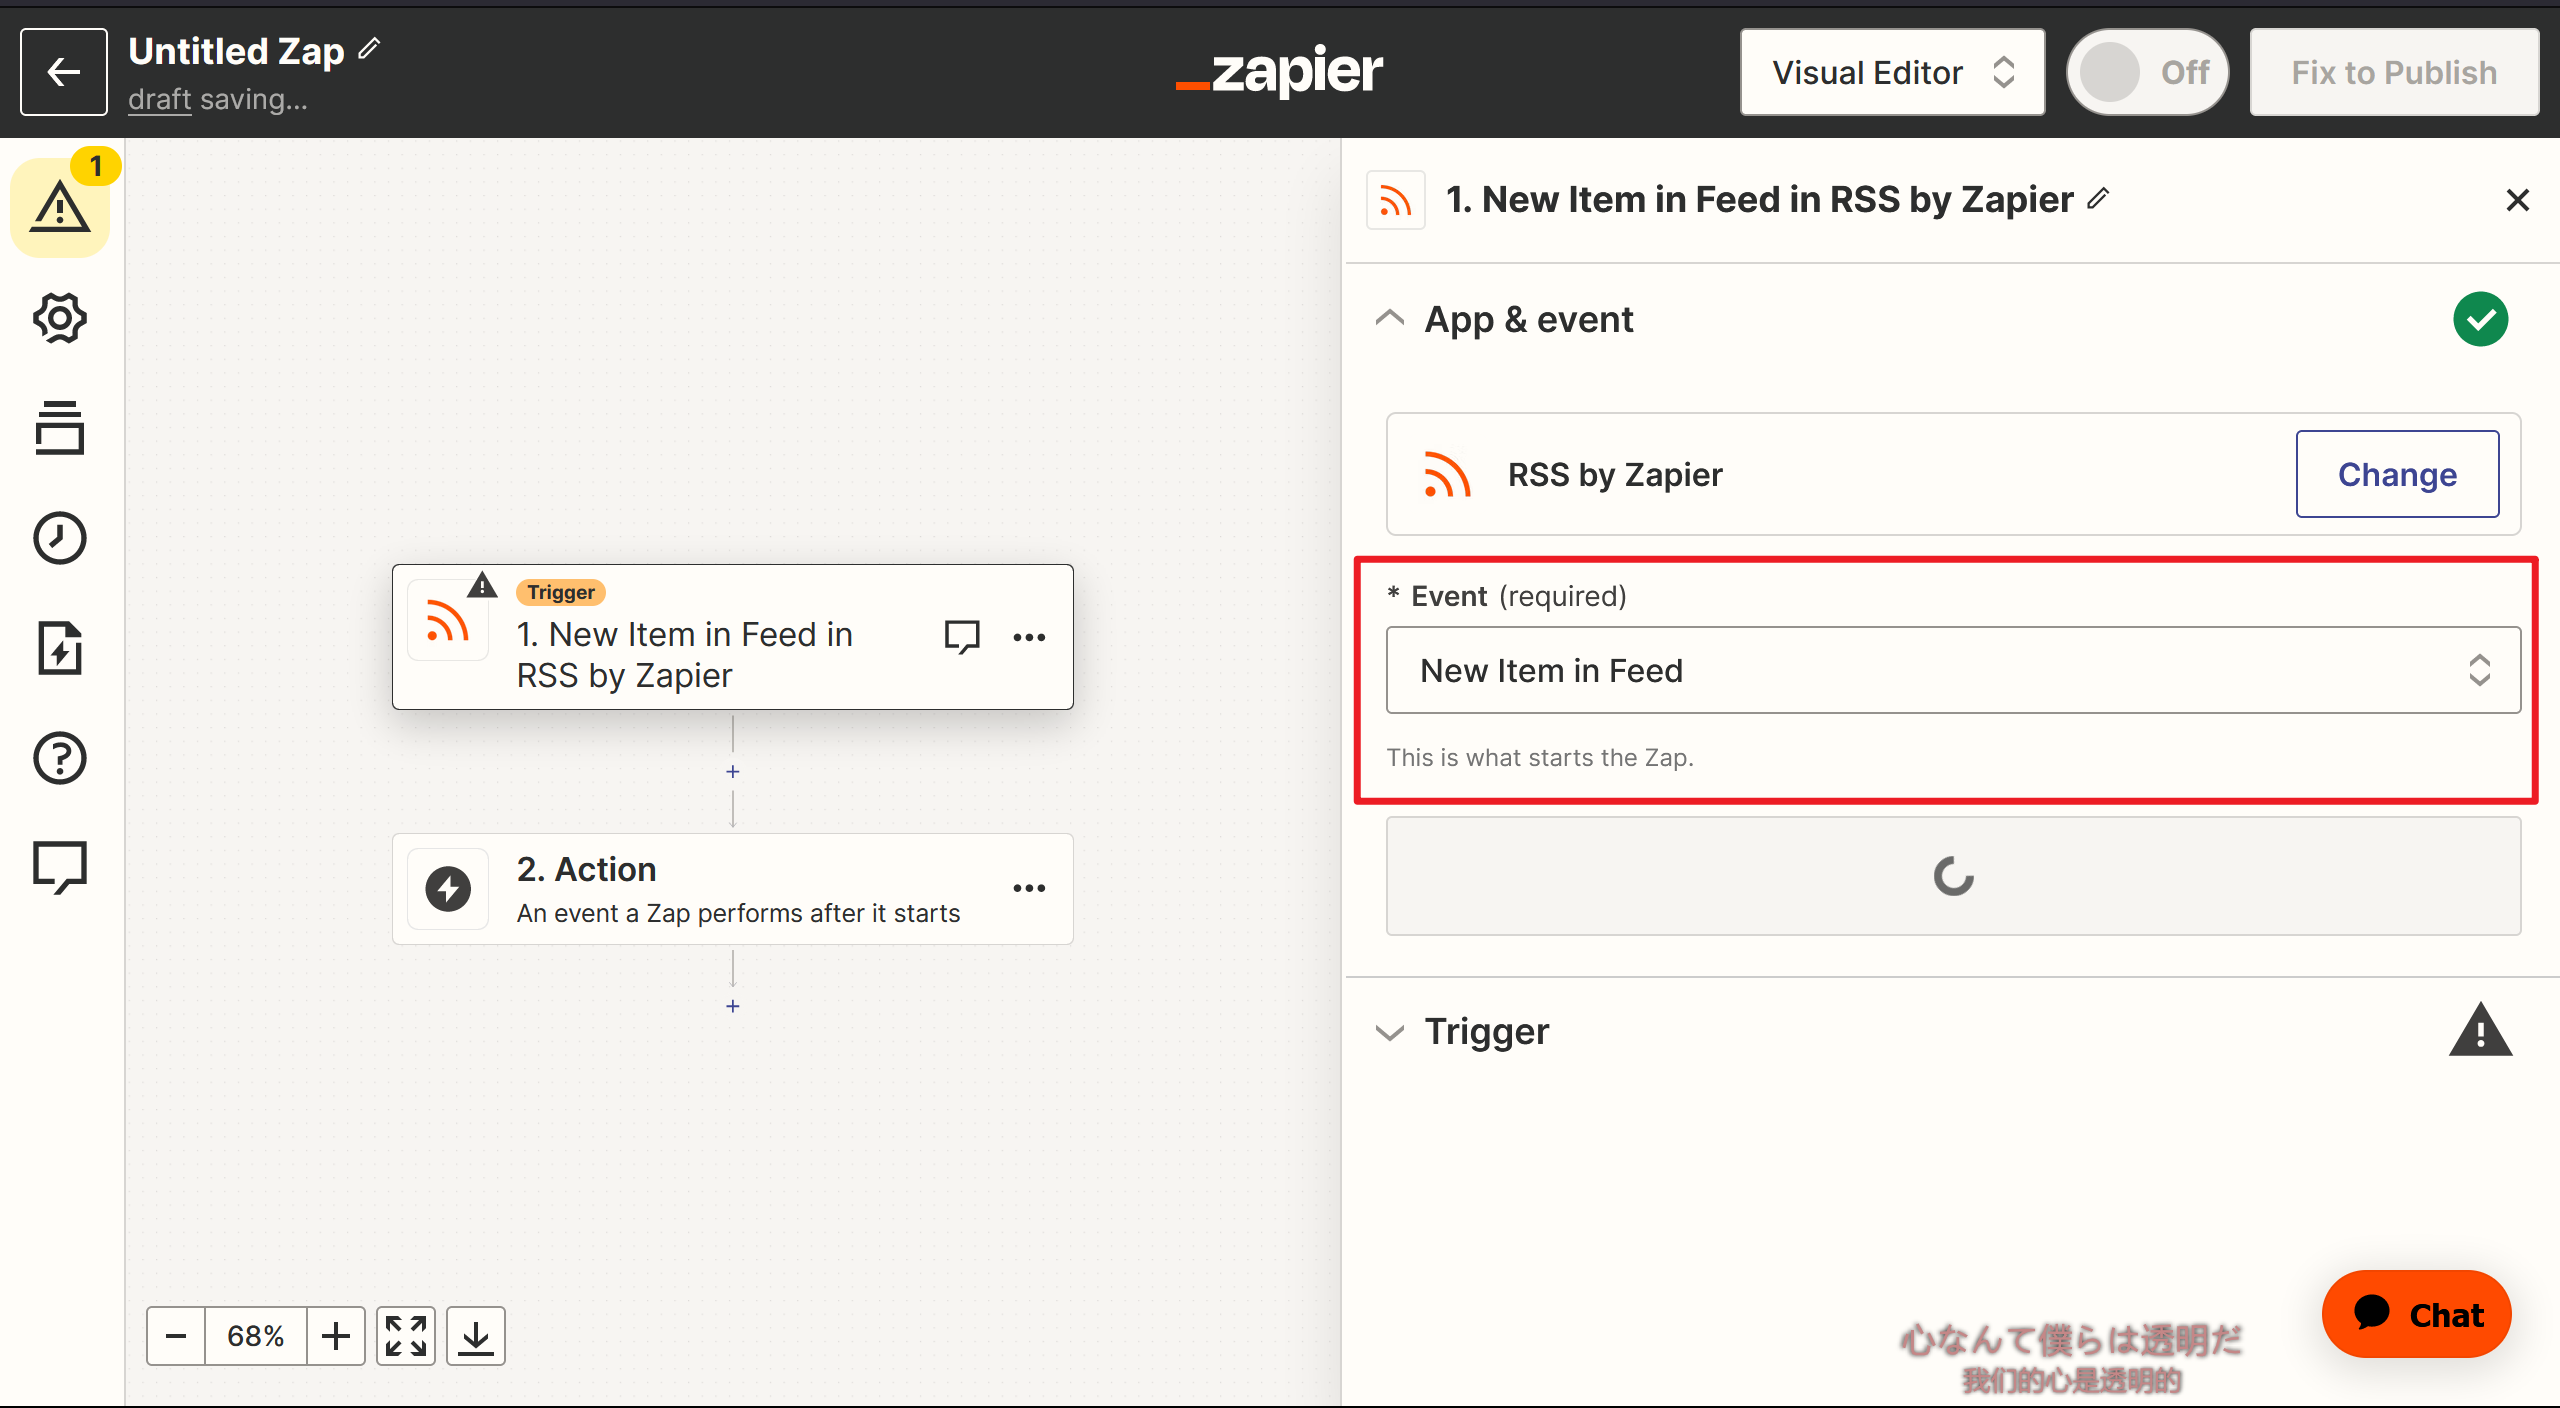
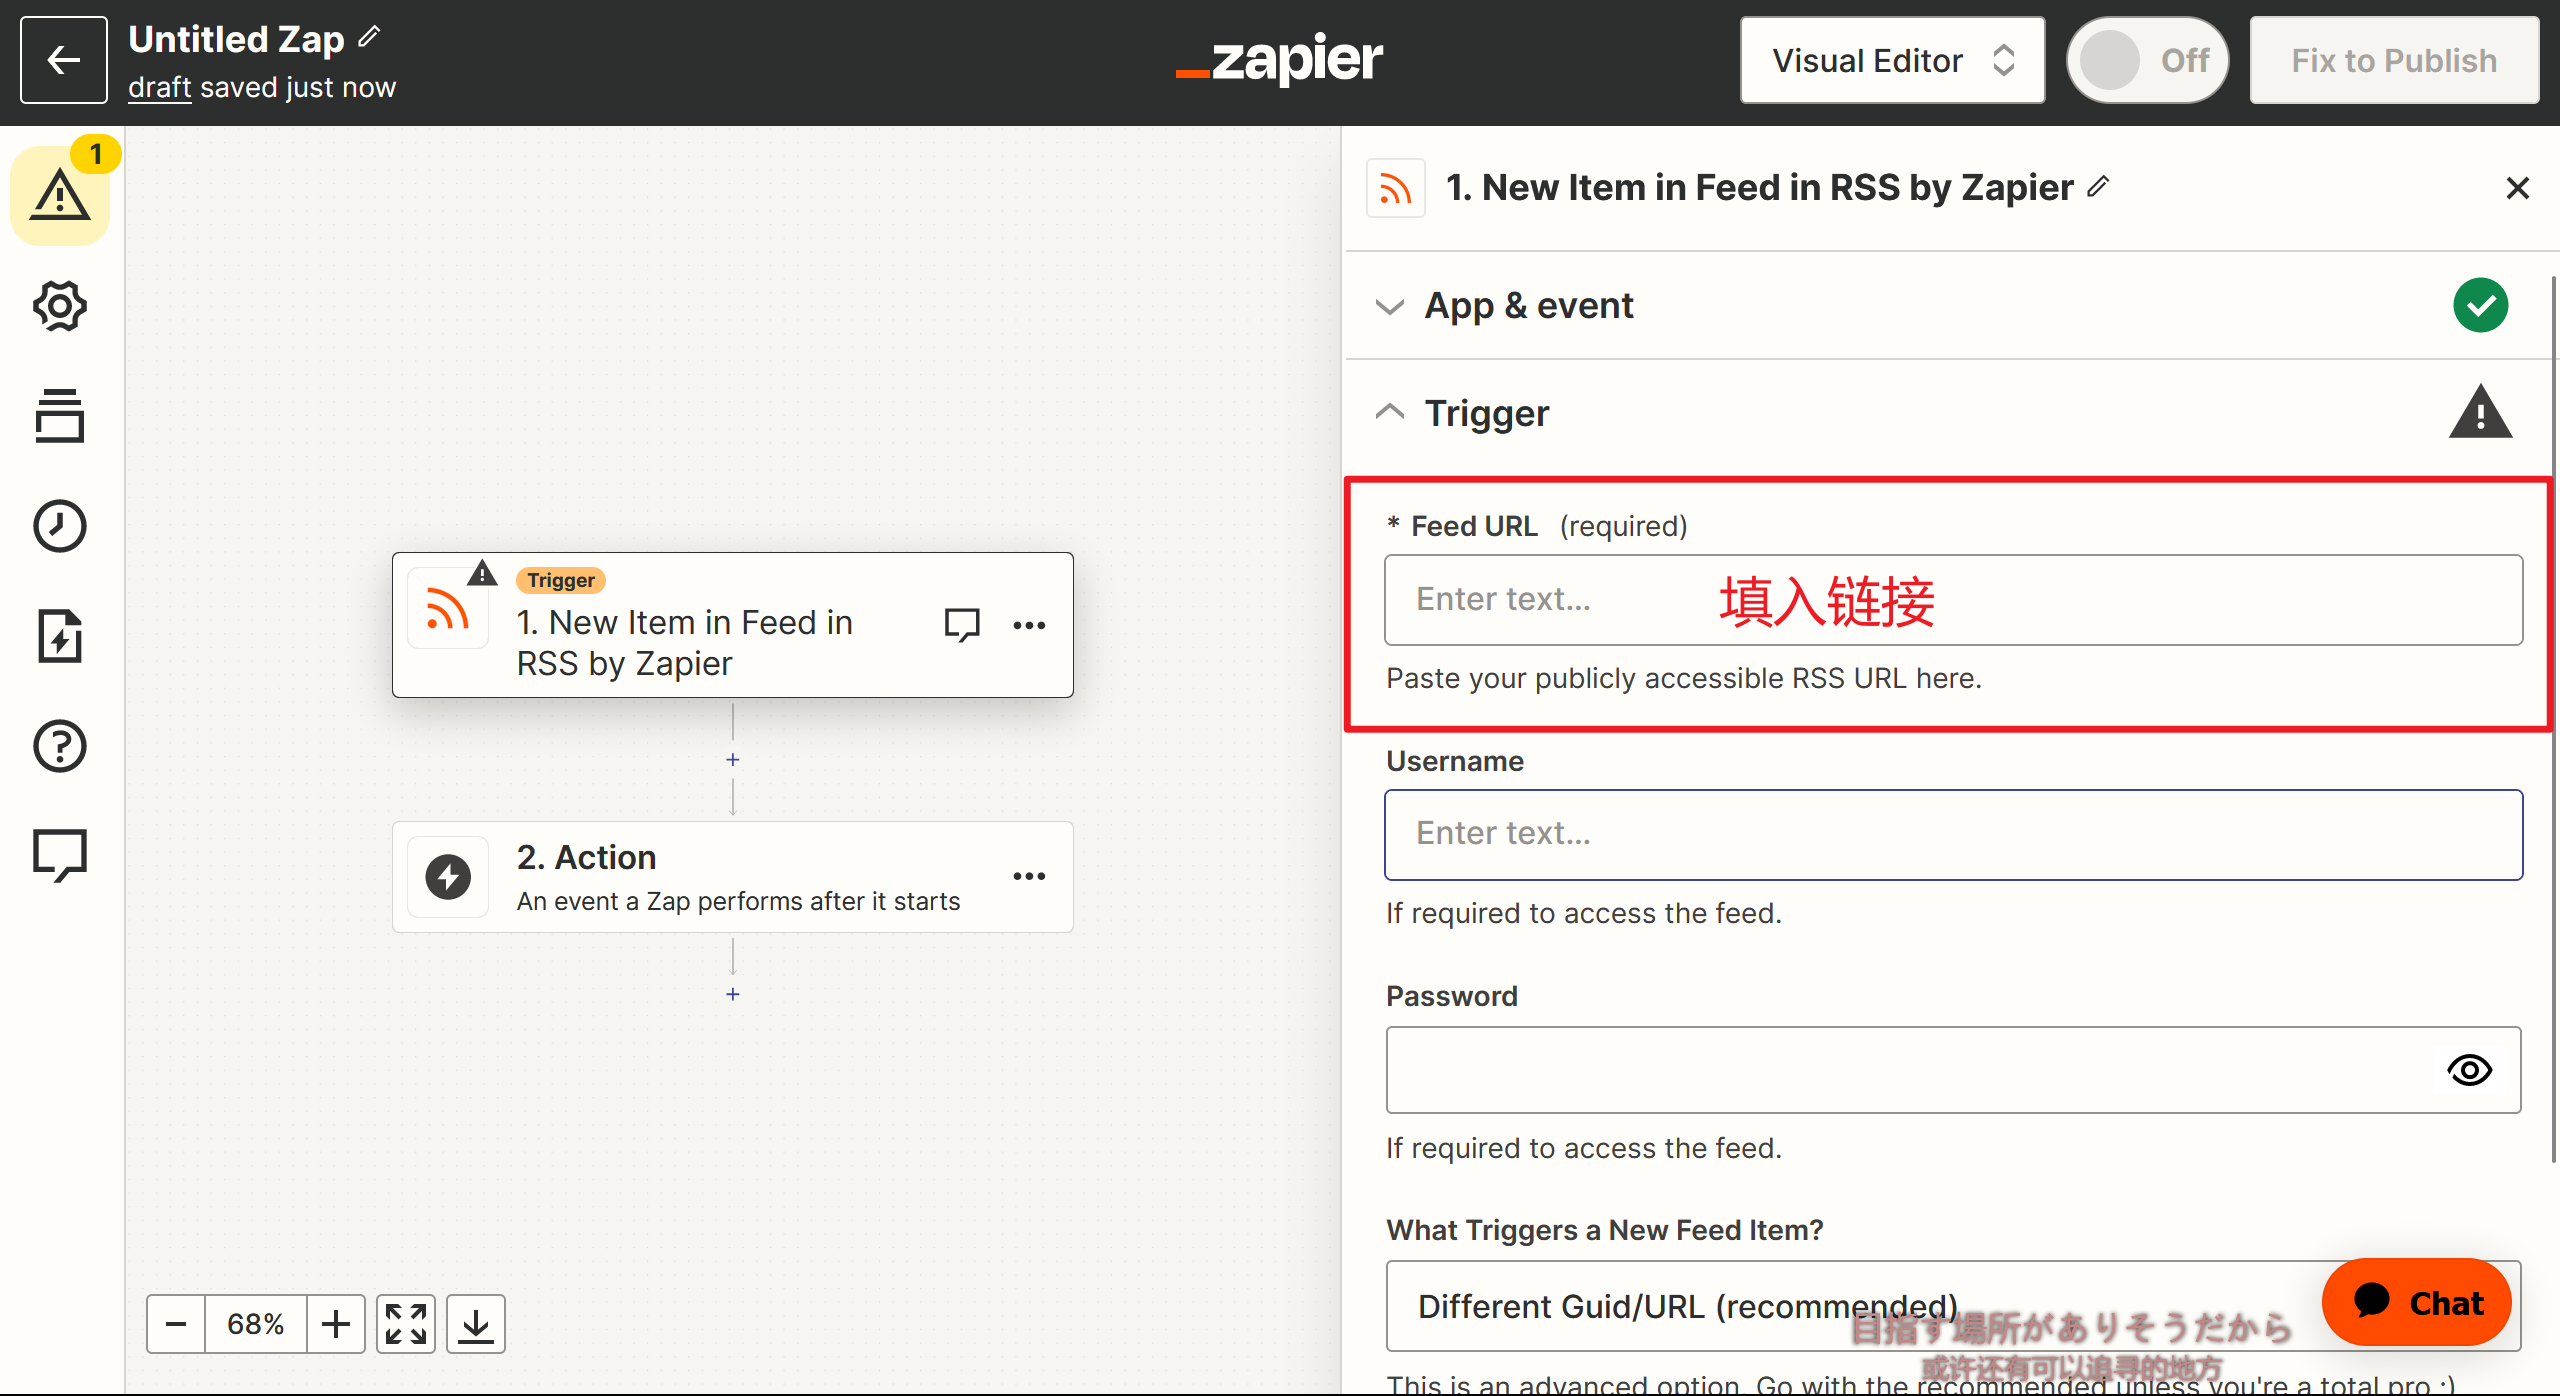
- 设置触发器,按下图的红框依次操作
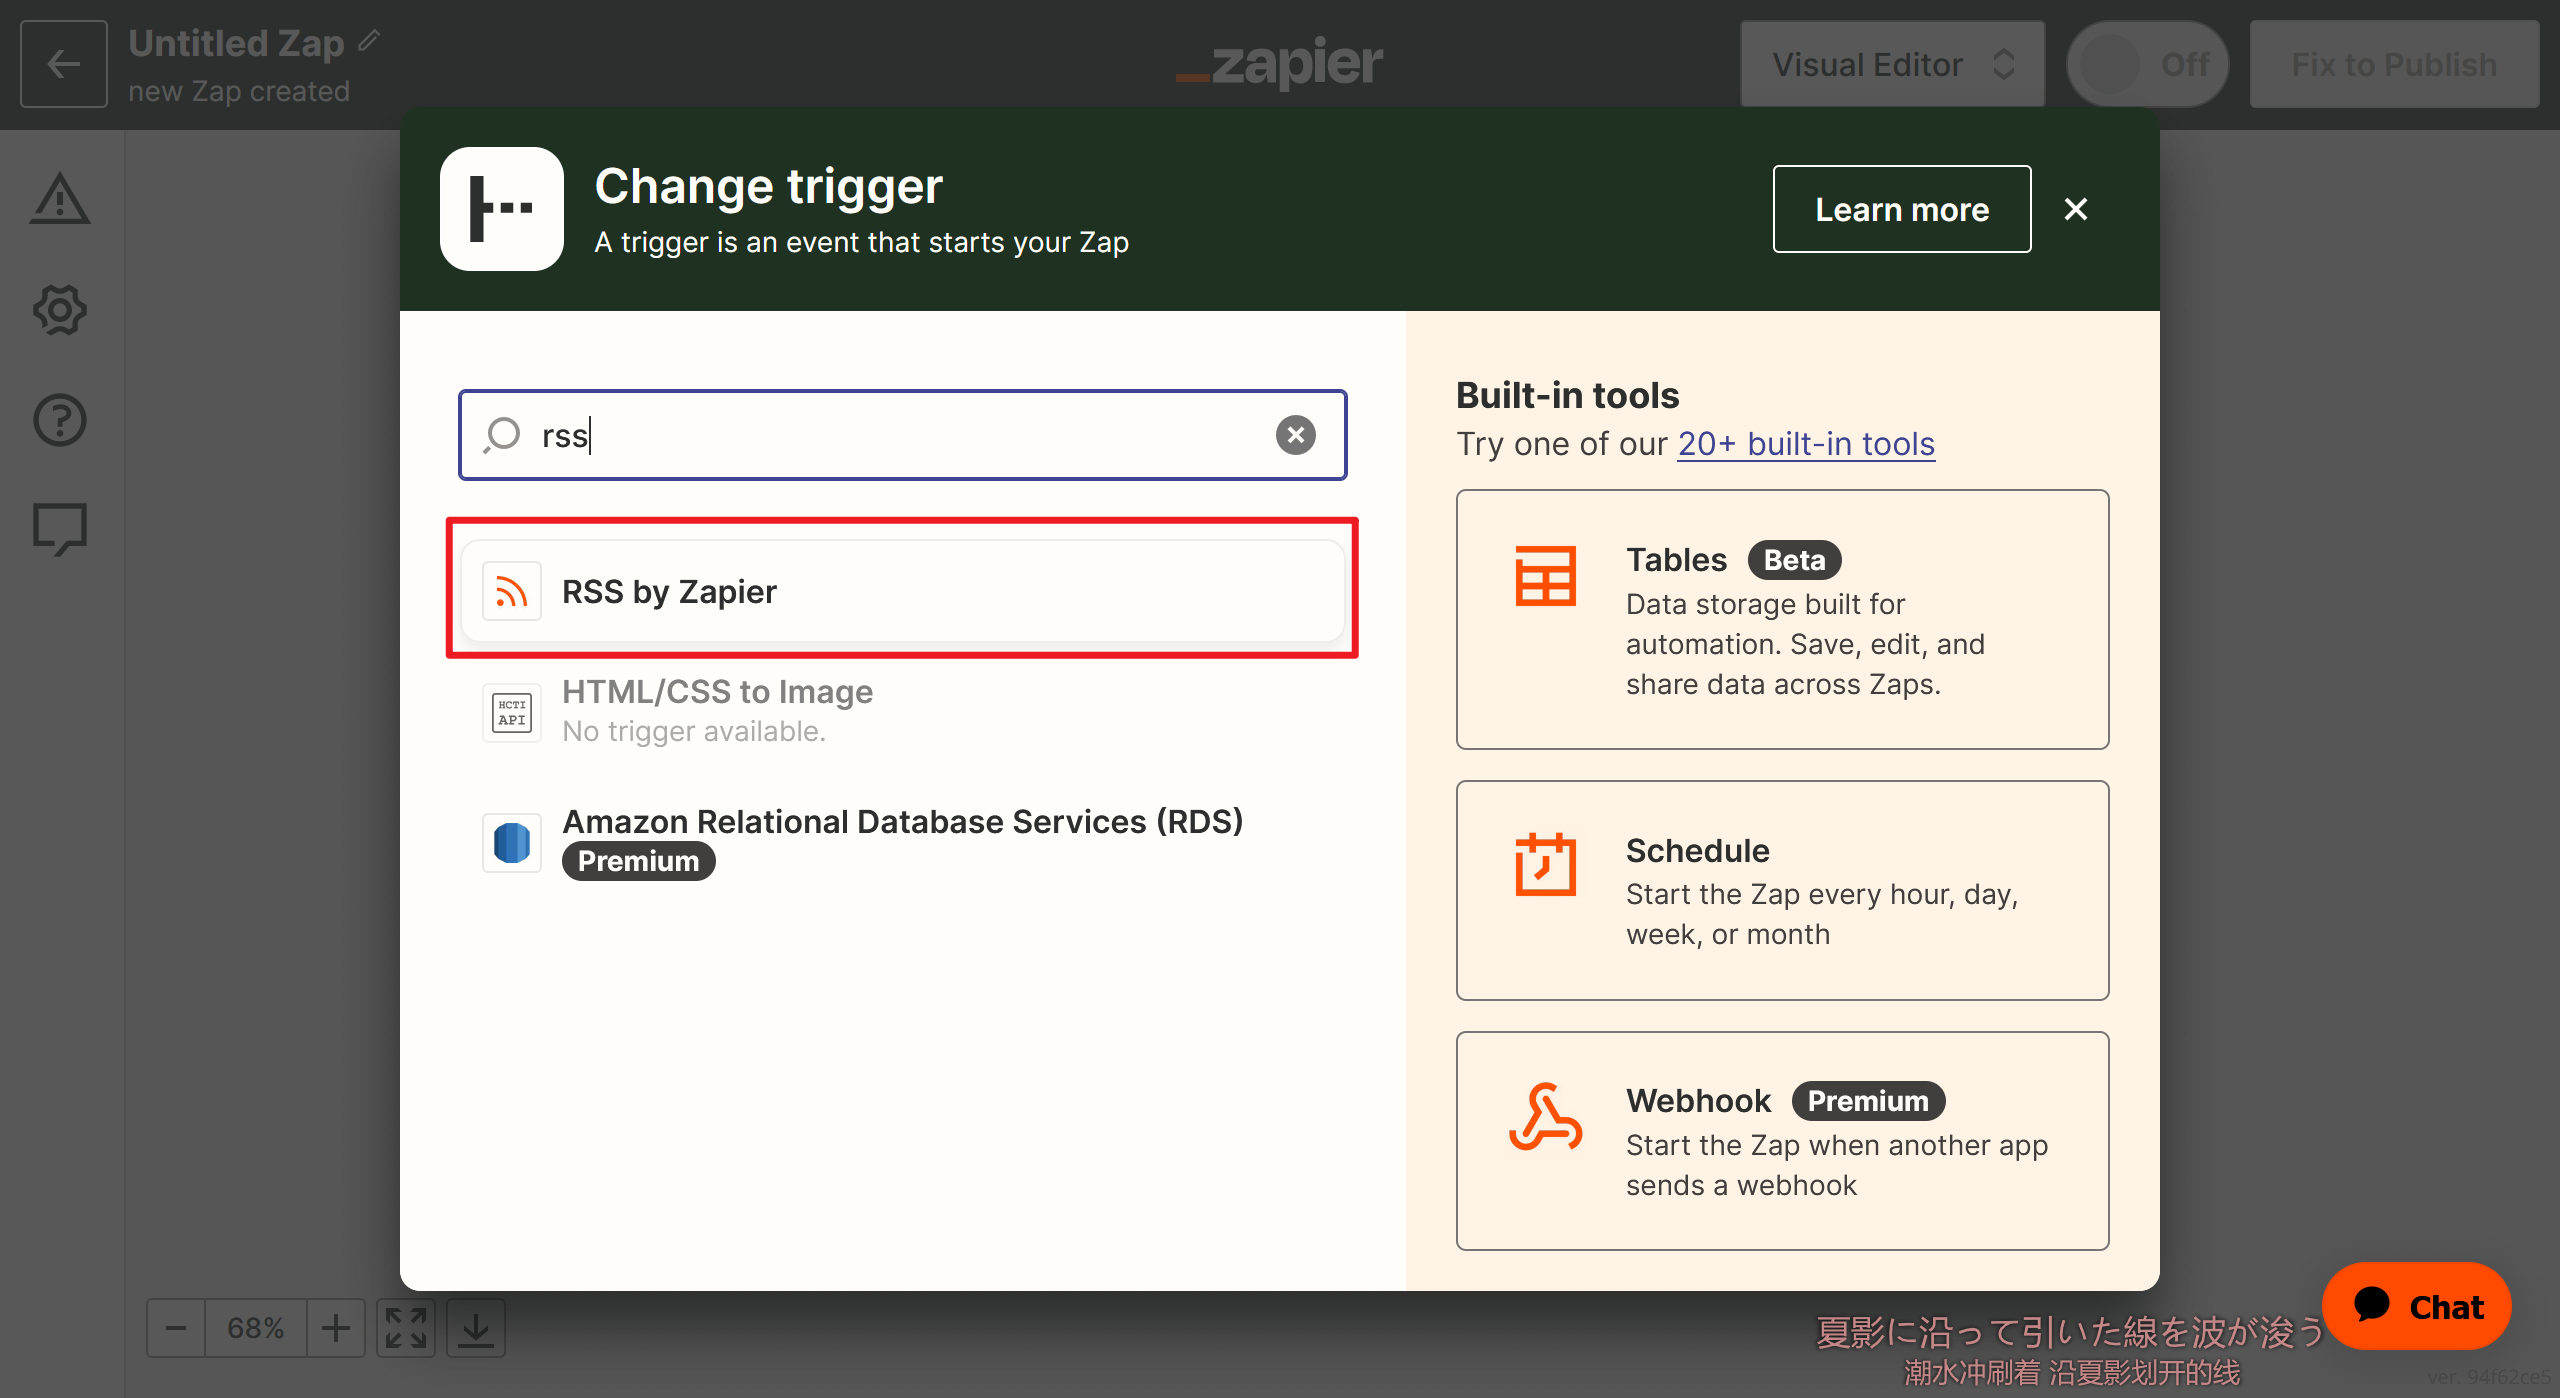
即当RSS更新时触发发送电子邮件
- 设置动作,按下图红框依次操作
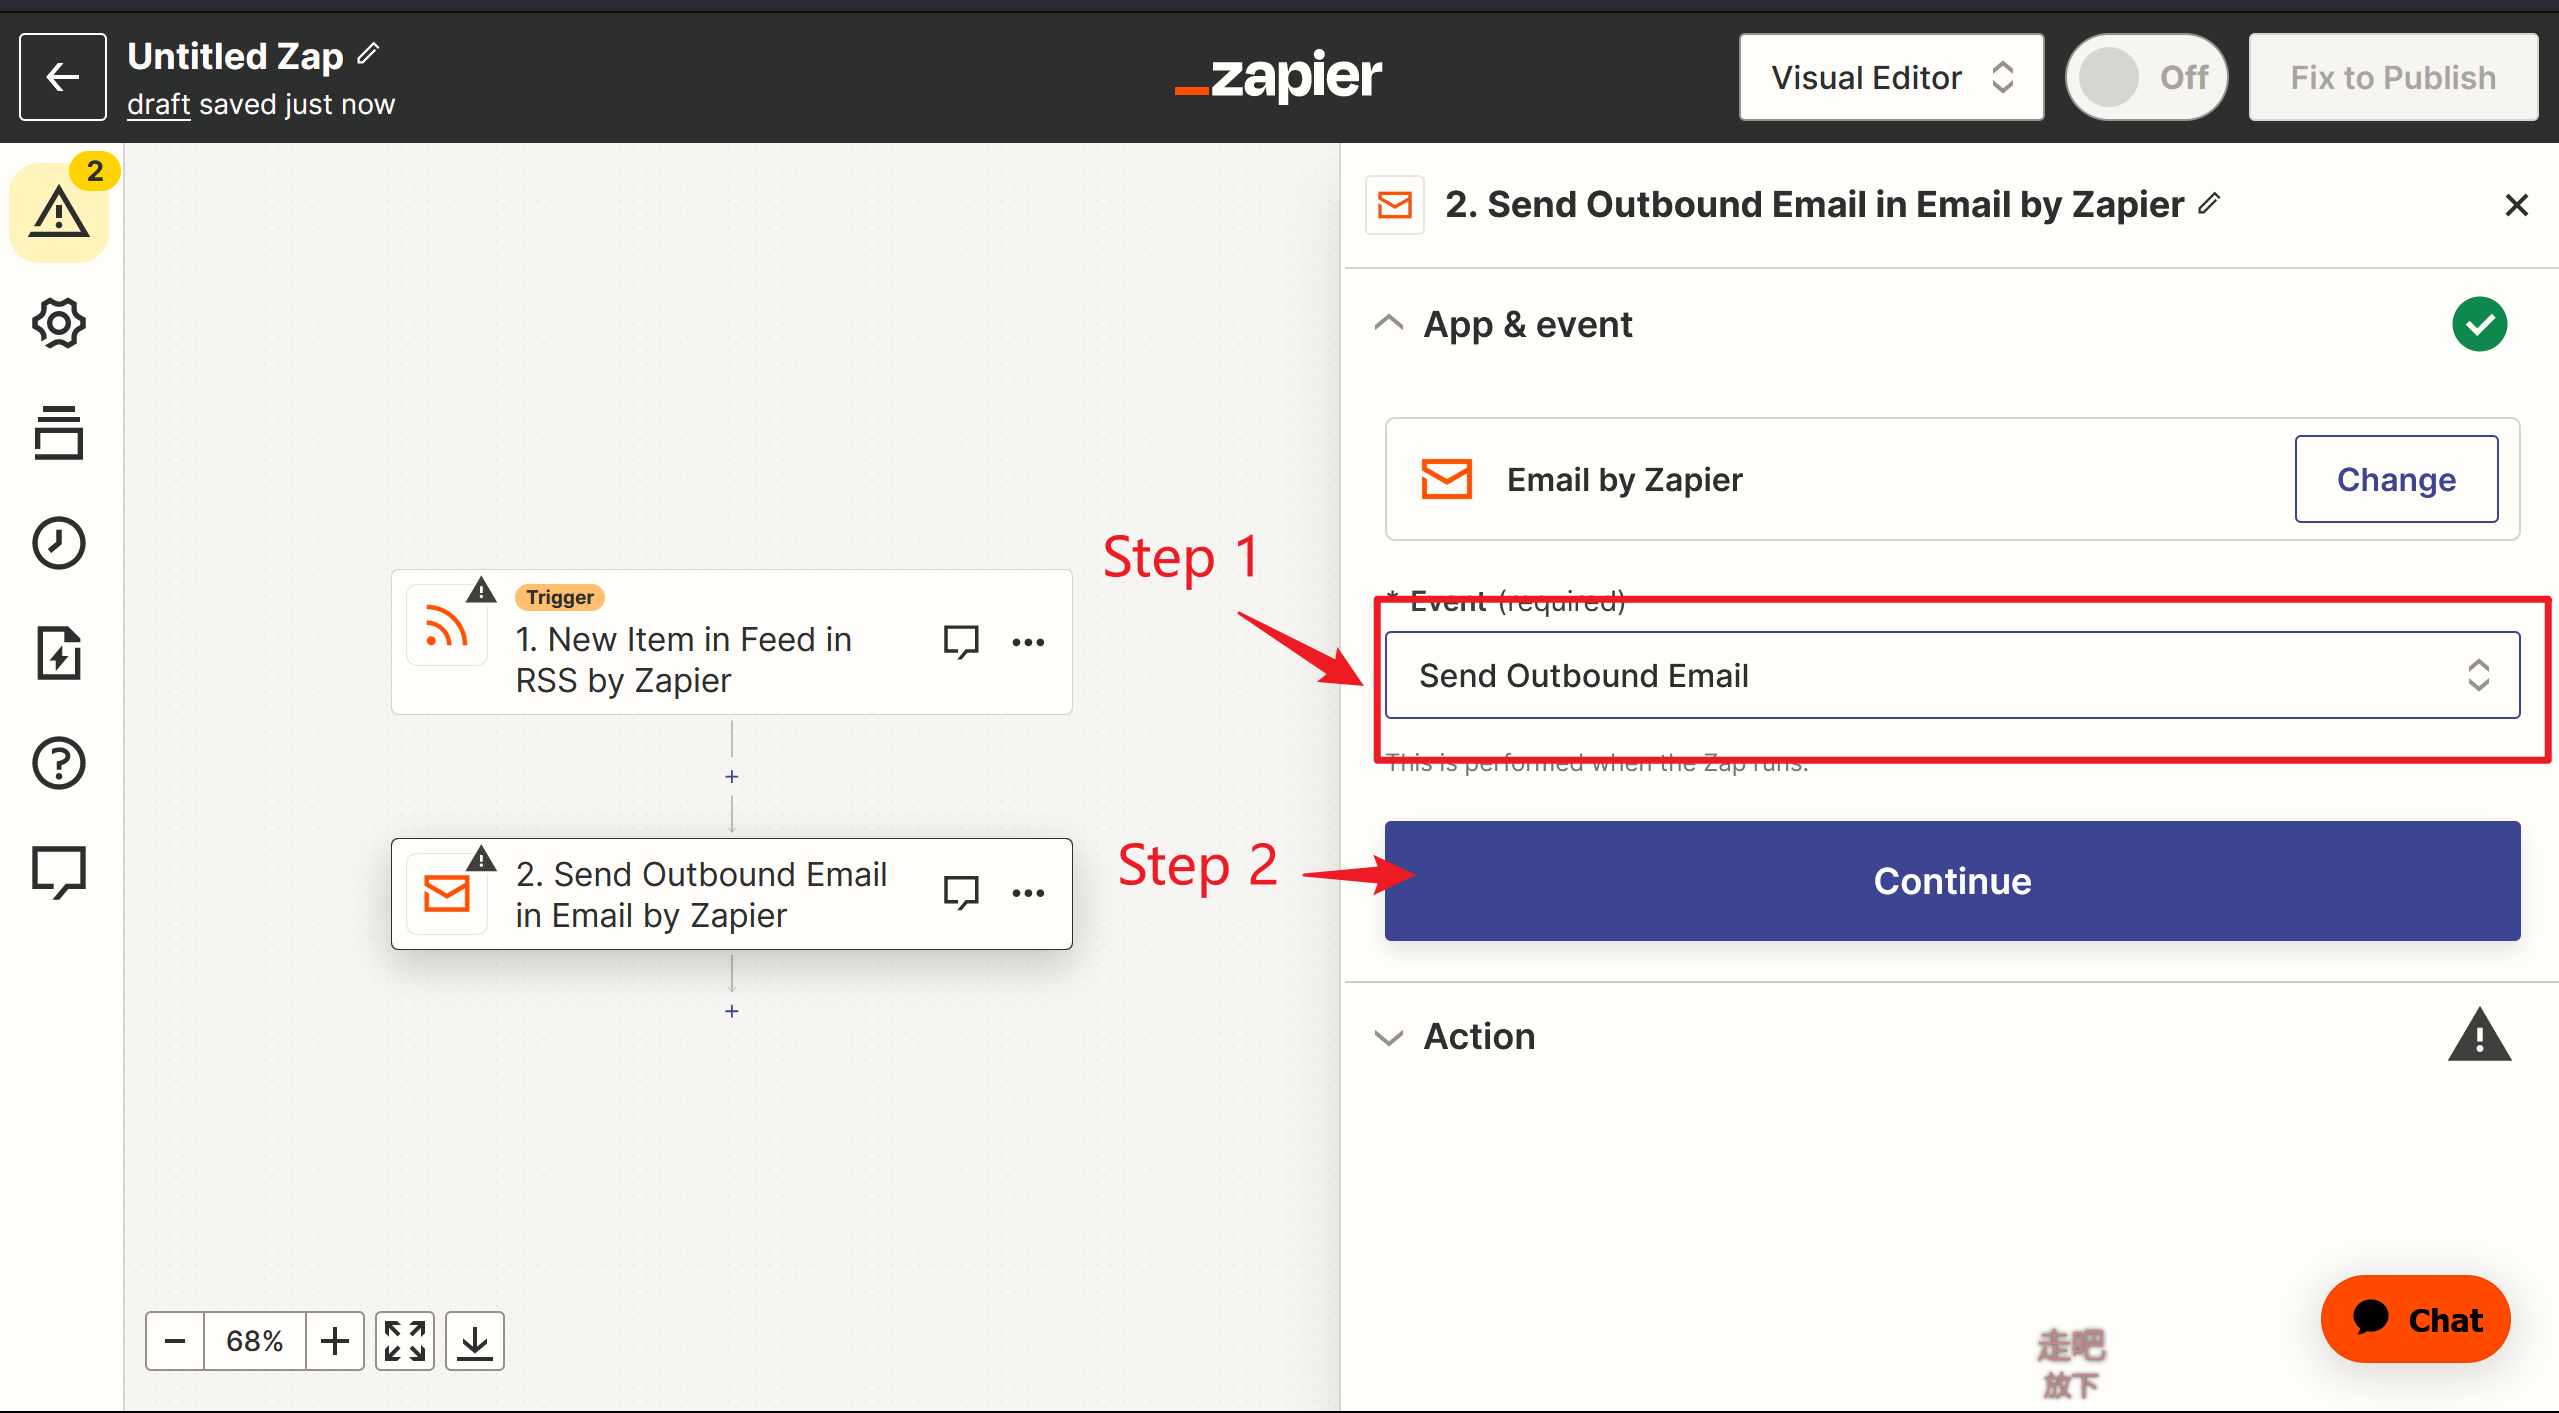
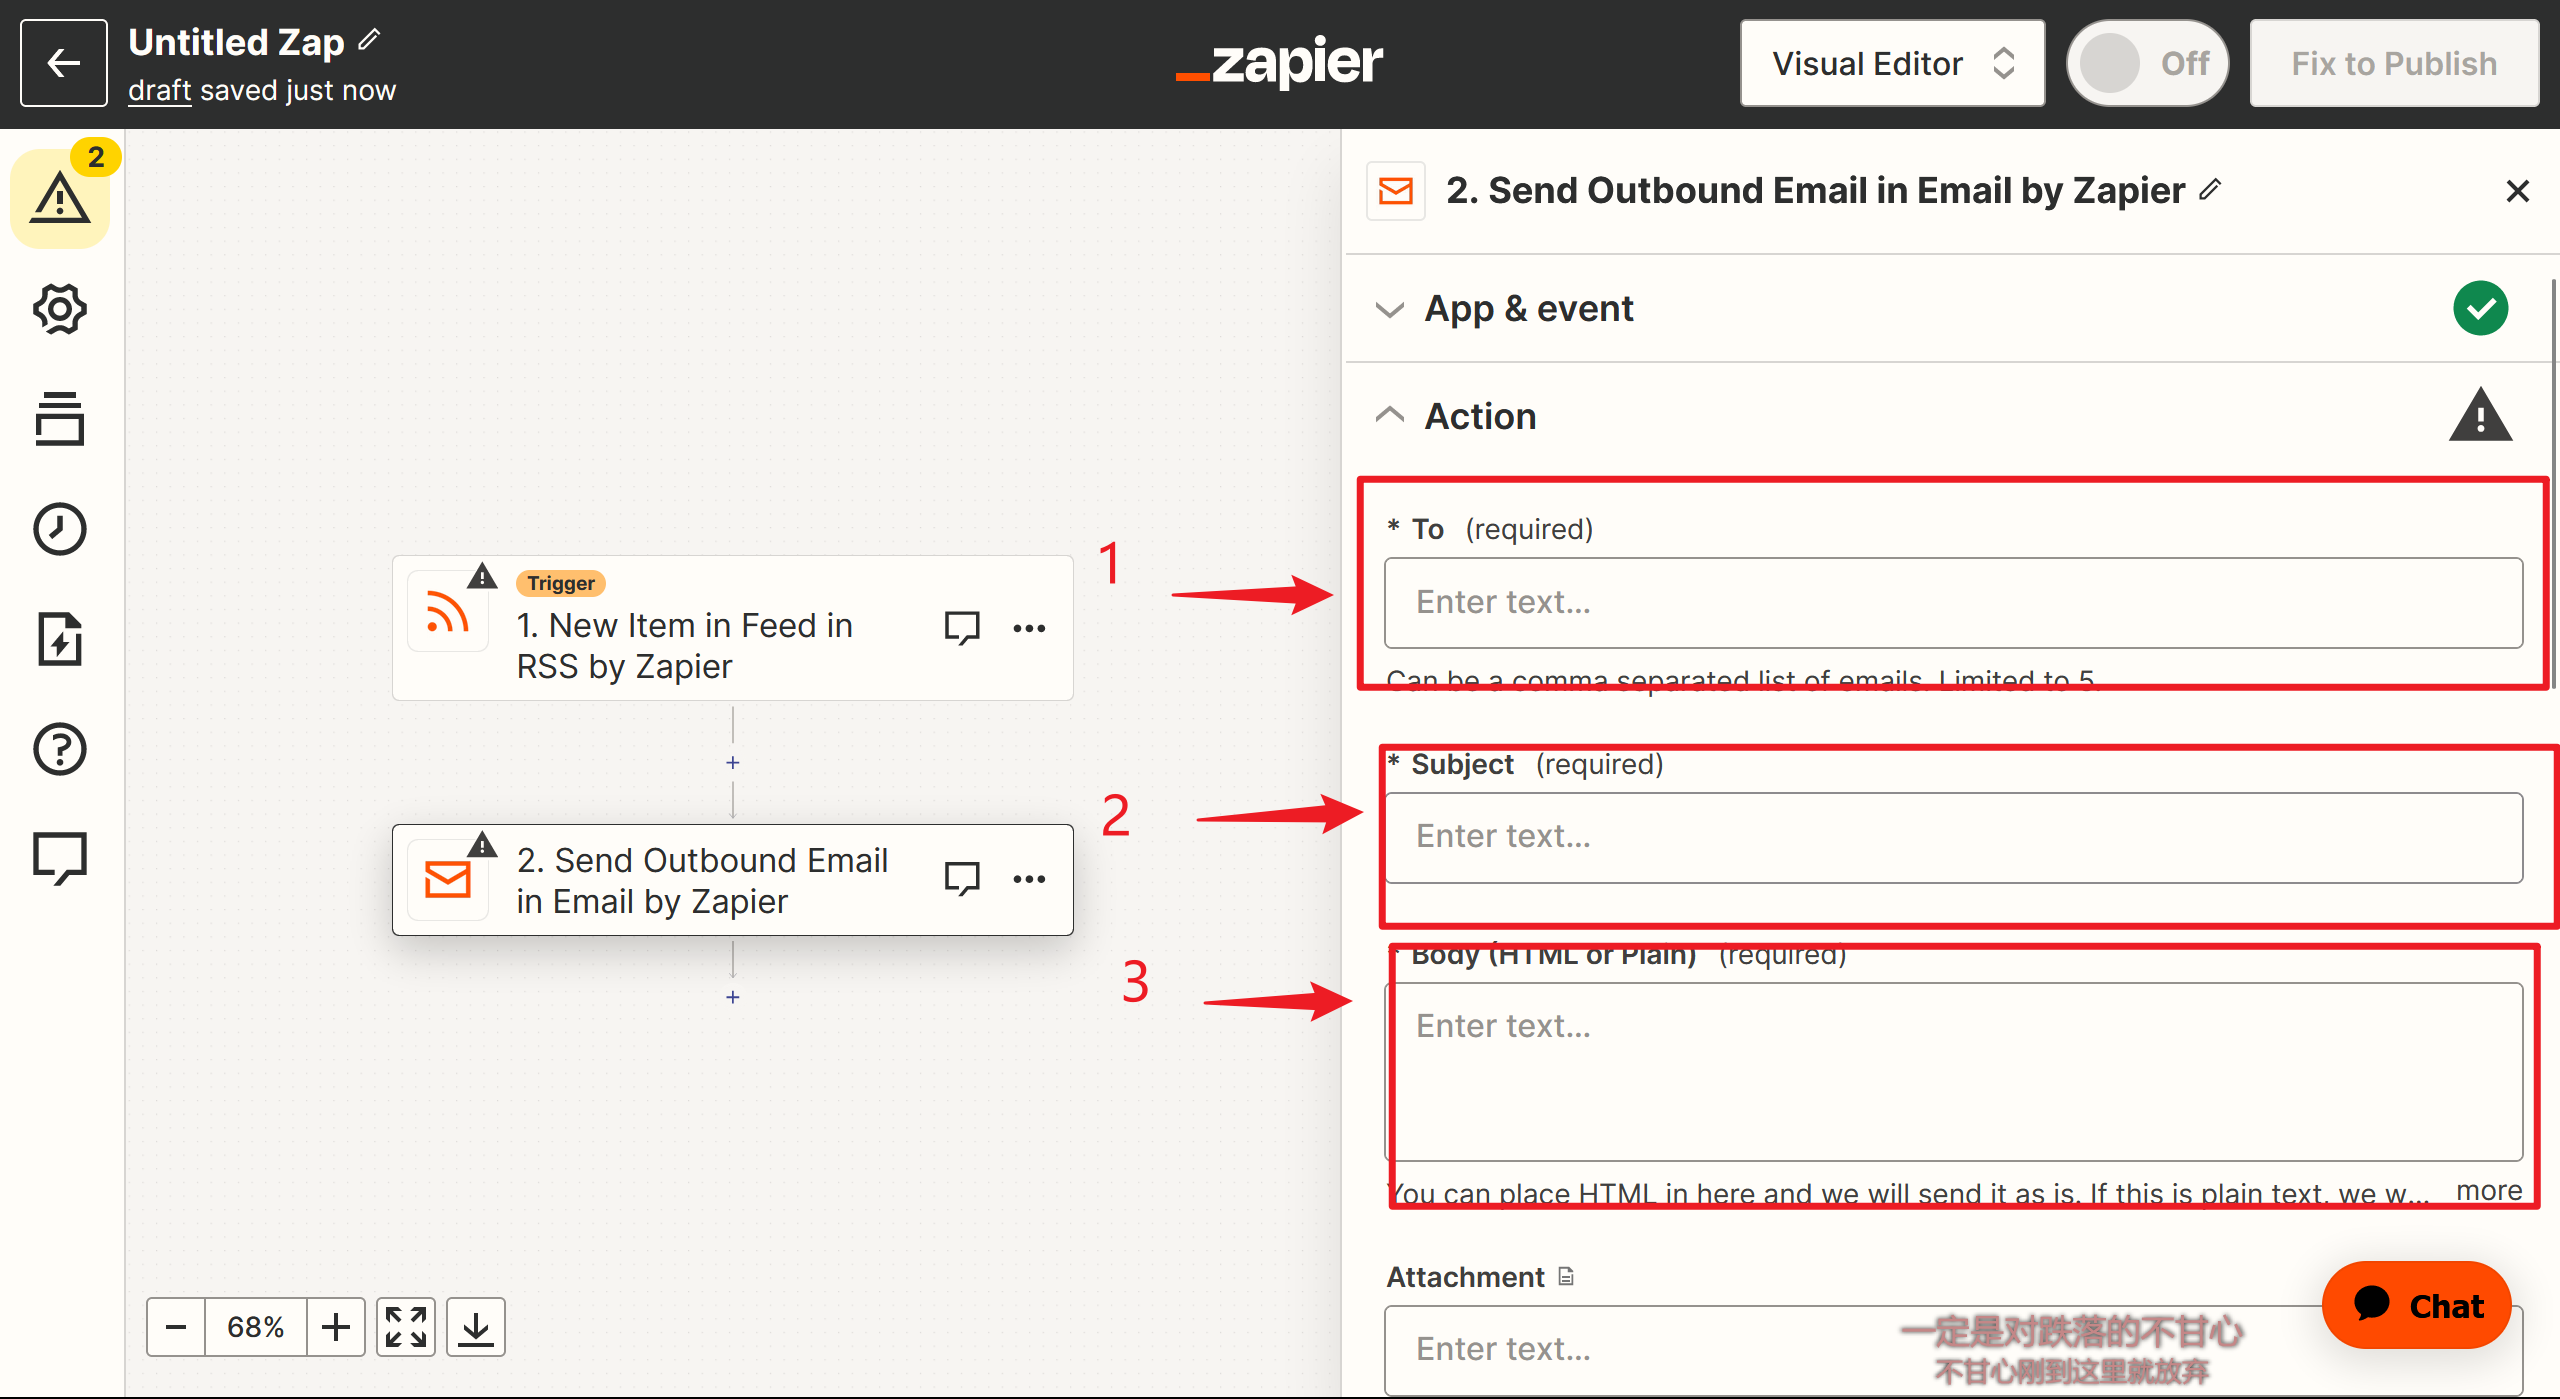
下图的1、2、3依次填入:
To :刚才获取的tinyletter的邮件地址
Subject : 填你喜欢的名字
Body : 填入发件内容,可以参考我附在末尾的html代码

最后在仪表盘看到这种效果就行了

附html代码:
1
2
3
4
5
6
7
8
9
10
11
12
13
14
15
16
17
18
19
20
21
22
23
24
25
26
27
28
29
30
31
32
33
34
35
36
37
38
39
40
41
42
43
44
45
46
47
48
49
50
51
52
53
54
55
56
57
58
59
60
61
62
63
64
65
66
67
68
69
70
71
72
73
74
75
76
77
78
79
80
81
82
83
84
85
86
87
88
89
90
91
92
93
94
95
96
97
98
99
100
101
102
103
104
105
106
107
108
109
110
111
112
113
114
115
116
117
118
119
120
121
122
123
124
125
126
127
128
129
130
131
132
| <!DOCTYPE html>
<div class="main">
<div class="circle-cover" style="text-align: center;"><div class="circle"></div></div>
<img class="main-img" src="https://cdn.luogu.com.cn/upload/image_hosting/0xd4prt2.png">
<h1>本站更新了</h1>
<P>发送时间</P>
<span id="time"></span>/*这里的标题和链接都要改成自己的(插入的数据)*/
<div class="post"><p class="title">标题<br>{{205114825__title}}</p></div>
<a href="{{205114825__link}}"><div class="link">跳转</div></a>
<img class="footer" src="https://raw.gitmirror.com/genkaim/blog_img/main/data/line_s.png">
</div>
<style>
.post {
margin-top: 25px;
margin-left: 25px;
width: 300px;
height: 100px;
background: #d5d5d5;
border-radius: 8px;
}
.post p {
margin-top: 25px !important;
display: flex;
align-items: center;
justify-content: center;
height: 100%;
}
.title {
font-weight: bold;
}
a {
text-decoration: none;
color: white;
}
#time {
background: linear-gradient(to right, #365262 0%, #1c6a54 50%, #254050 100%);
background-clip: text;
-webkit-background-clip: text;
-webkit-text-fill-color: transparent;
}
#time {
display: block;
margin: 0 auto;
font-weight: bold;
text-align: center;
}
h1 {
background: linear-gradient(to right, #365262 0%, #1c6a54 50%, #254050 100%);
background-clip: text;
-webkit-background-clip: text;
-webkit-text-fill-color: transparent;
text-align: center;
margin-top: 20px;
}
p {
background: linear-gradient(to right, #365262 0%, #1c6a54 50%, #254050 100%);
background-clip: text;
-webkit-background-clip: text;
-webkit-text-fill-color: transparent;
text-align: center;
}
.main-img {
width:100%;
overflow:hidden;
pointer-events:none;
margin-top: -120px;
border-radius: 8px;
width: 300px;
display: block;
margin: auto;
margin-top: 40px;
}
.main {
padding:40px 0px 20px;
margin:0px;
background-color: #f1e6e6;
width: 350px;
height: 700px;
border-radius: 8px;
}
.footer {
width: 350px;
margin-left: 10px;
}
.p {
display: flex;
top: 10px;
align-items: center;
justify-content: center;
height: 100%;
font-size: 10px !important;
}
.link {
font-size: 15px;
background: #b3b3b3;
border-radius: 8px;
margin: 40px auto;
padding: 5px;
color: white;
width: 150px;
height: 50px;
display: block;
text-align: center;
font-weight: bold;
line-height: 50px;
}
.circle {
width: 30px;
height: 30px;
border-radius: 50%;
background-color: rgb(255, 255, 255);
margin: auto;
box-shadow: inset 0 0 10px rgb(22, 22, 22);
background-image: url(https://cdn.luogu.com.cn/upload/image_hosting/py13qt58.png);
background-size: 95% 100%;
}
</style>
<script>
fetch('http://quan.suning.com/getSysTime.do')
.then(response => response.json())
.then(data => {
var timeString = data.sysTime2;
document.getElementById('time').textContent = timeString;
});
</script>
</html>
|